Culinary Innovations: The Thermomix

Thermomix is a unique all-in-one kitchen appliance made by the German Corporate Group Vorwerk.

thermomix
Image via the Thermomix website.

The Thermomix unites the functions of 12 appliances in one compact unit, which include:
– Chopping
– Whipping
– Mixing
– Emulsifying
– Milling
– Kneading
– Cooking
– Blending
– Stirring
– Steaming
– Weighing
– Precise heating

Here is a promotional video for the new TM5 model:

The Thermomix on the market today is a product of more than 40 years of German design and innovation. Nevertheless, the concept for the Thermomix kitchen appliance actually began in France in 1970. Given that thick and hearty soups were a favourite among the French, the then CEO of Vorwerk France came up with the idea of designing a kitchen appliance that could mix and cook all at the same time. When he shared his idea at Vorwerk, it was greeted with enthusiasm, and research and production quickly followed suit. Within only one year, the first model was launched: the original Thermomix VM 2000. Throughout the years, Vorwerk has continued researching and developing new, more advanced models with better performance and increased functions, the latest being the Thermomix TM5.
thermomix
The various models of the Thermomix since 1971. Image found here.

Needless to say, the Thermomix is an example of innovative technology. It can basically do everything a blender, a food processor, an electric mixer, a steamer, a slow cooker, a timer, a double boiler, an ice cream machine, a coffee machine, a kitchen scale, a stovetop can do – just to name a few – but all in one device! At $1600 C, the price is quite steep, but if you were to add up the cost of all those single purpose devices, which all require their own counter space, the Thermomix not only saves you a great deal money, but also a huge amount of space in the kitchen.

I first found out about the Thermomix when I overheard my chef talking about the device with a coworker. He described it as a “kitchen-robot” – a machine that you can set and forget, and can prepare almost anything. He used an example of what the Thermomix could accomplish in our Italian kitchen: with the push of a button, the Thermomix could make a perfect batch of risotto in less than 20 minutes, which would be consistent every time (given the same recipe, of course). After hearing about it at work I did more research on it and came up with some pros and cons of the Thermomix in a commercial kitchen:
PROS:
– saves time 
– less labour needed
– creates consistency (dishes come out the exact same every time)
– saves space (less equipment needed)
– saves money (on both labour and equipment costs)
– allows multitasking (cooks can make something in Thermomix while doing another task)

CONS:
– cuts labour (less jobs for cooks)
– less skill needed for cooks (Thermomix can do many complicated tasks)
– takes joy out of cooking
– low yield (small device)

At an initial glance, the pros outweighs the cons.  Nevertheless, I don’t believe that the Thermomix will catch on in commercial kitchens, or affect my job in the long term in regards to my labour required in the kitchen as a cook. This is because the Thermomix has too low of a yield for any commercial kitchen – it would be much better suited for a home kitchen or a very small scale operation. Furthermore, most people go to restaurants to eat food that has had effort put into it by a human – not a machine – people want to eat and taste chef creations. To go back to to the risotto example, I think people would be very disappointed and not return to a restaurant knowing the risotto came out of a machine, rather than made by hand by a cook/chef. On the other hand, I think the Thermomix would be a great tool for a busy family that has very little time for cooking, but still wants to have high quality meals that typically require more time, effort, and labour. If I was a busy, working mother, I could definitely see myself using a Thermomix to save time, effort, and space in the kitchen.

Diets and Dietary Restrictions: The Paleo Diet

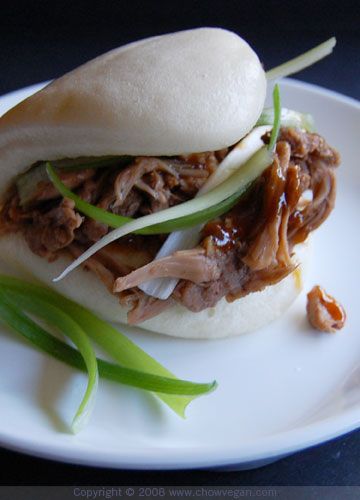
I decided to try out the Paleo diet for a week. Going “paleo” has been on trend for the past few years, as more people are becoming aware of the ill-effects of eating too many grains and processed foods. The paleo diet, in a nutshell, is a diet based on the types of foods presumed to have been eaten by early humans, consisting chiefly of meat, fish, vegetables, and fruit, and excluding dairy or grain products and processed food. You can read more about it on Robb Wolf’s comprehensive website. He is the New York Times Best Selling author of The Paleo Solution: The Original Human Diet, and has been a star player in in helping promote and educate people worldwide on the paleo diet.

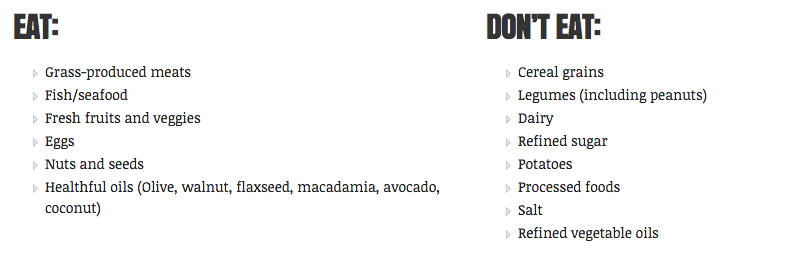
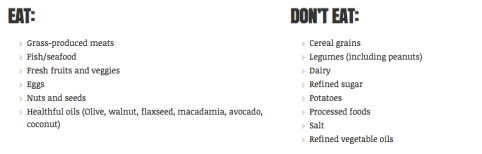
Here is what you can eat and what you must avoid on the Paleo diet:

Screen Shot 2015-03-27 at 11.58.34 AM

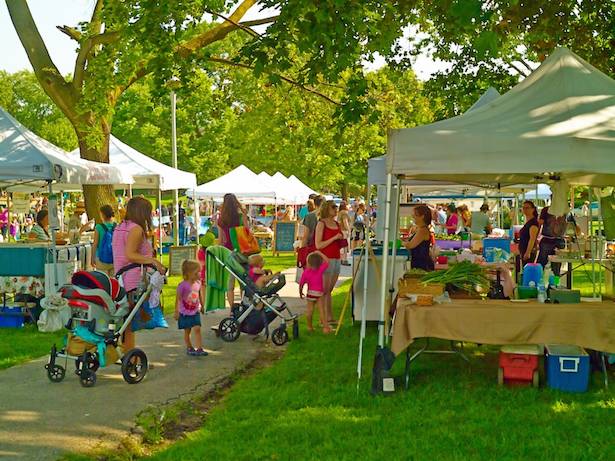
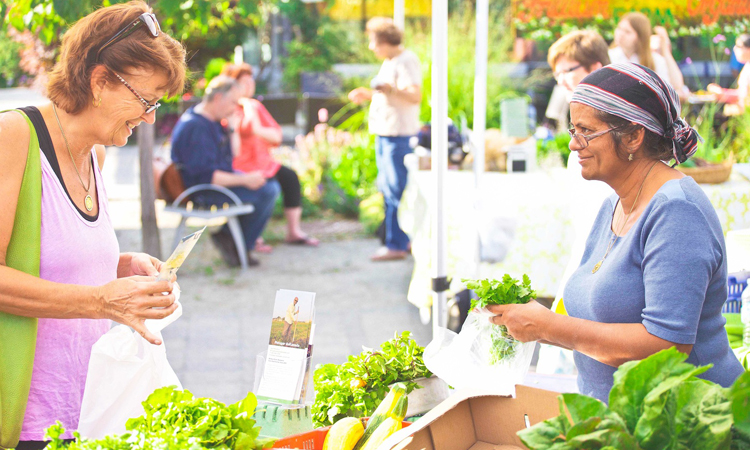
After browsing numerous paleo food blogs, I read and quickly realized that the best way to keep myself on track for the week was to be prepared. This meant getting a good grocery haul done on Sunday, planning out roughly what I would eat for the week, and doing some meal prep to have food on hand. As the saying goes, “If you fail to prepare, prepare to fail!”.

At the grocery store, I loaded my cart with:

1- A large variety of fresh fruits and vegetables 

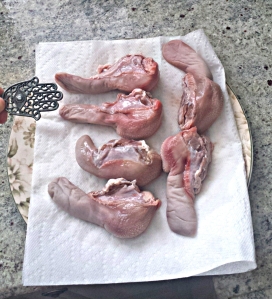
2 – Quality meats (grassfed ground beef, a whole organic chicken, pasture raised bacon, two cartons of organic eggs, canned tuna, and some prosciutto)

3 – Various nuts and seeds for snacking (no peanuts – not paleo!)

4 – Paleo-friendly root veggies and starches (sweet potatoes, butternut squash, green plaintains)

5 – Healthy fats (coconut oil and ghee for cooking, extra virgin olive oil for dressings, avocado oil)

I kept a daily log documenting my thoughts on experiences, which you can read about below:

Sunday:

Grocery shopping, meal planning & meal prep day.

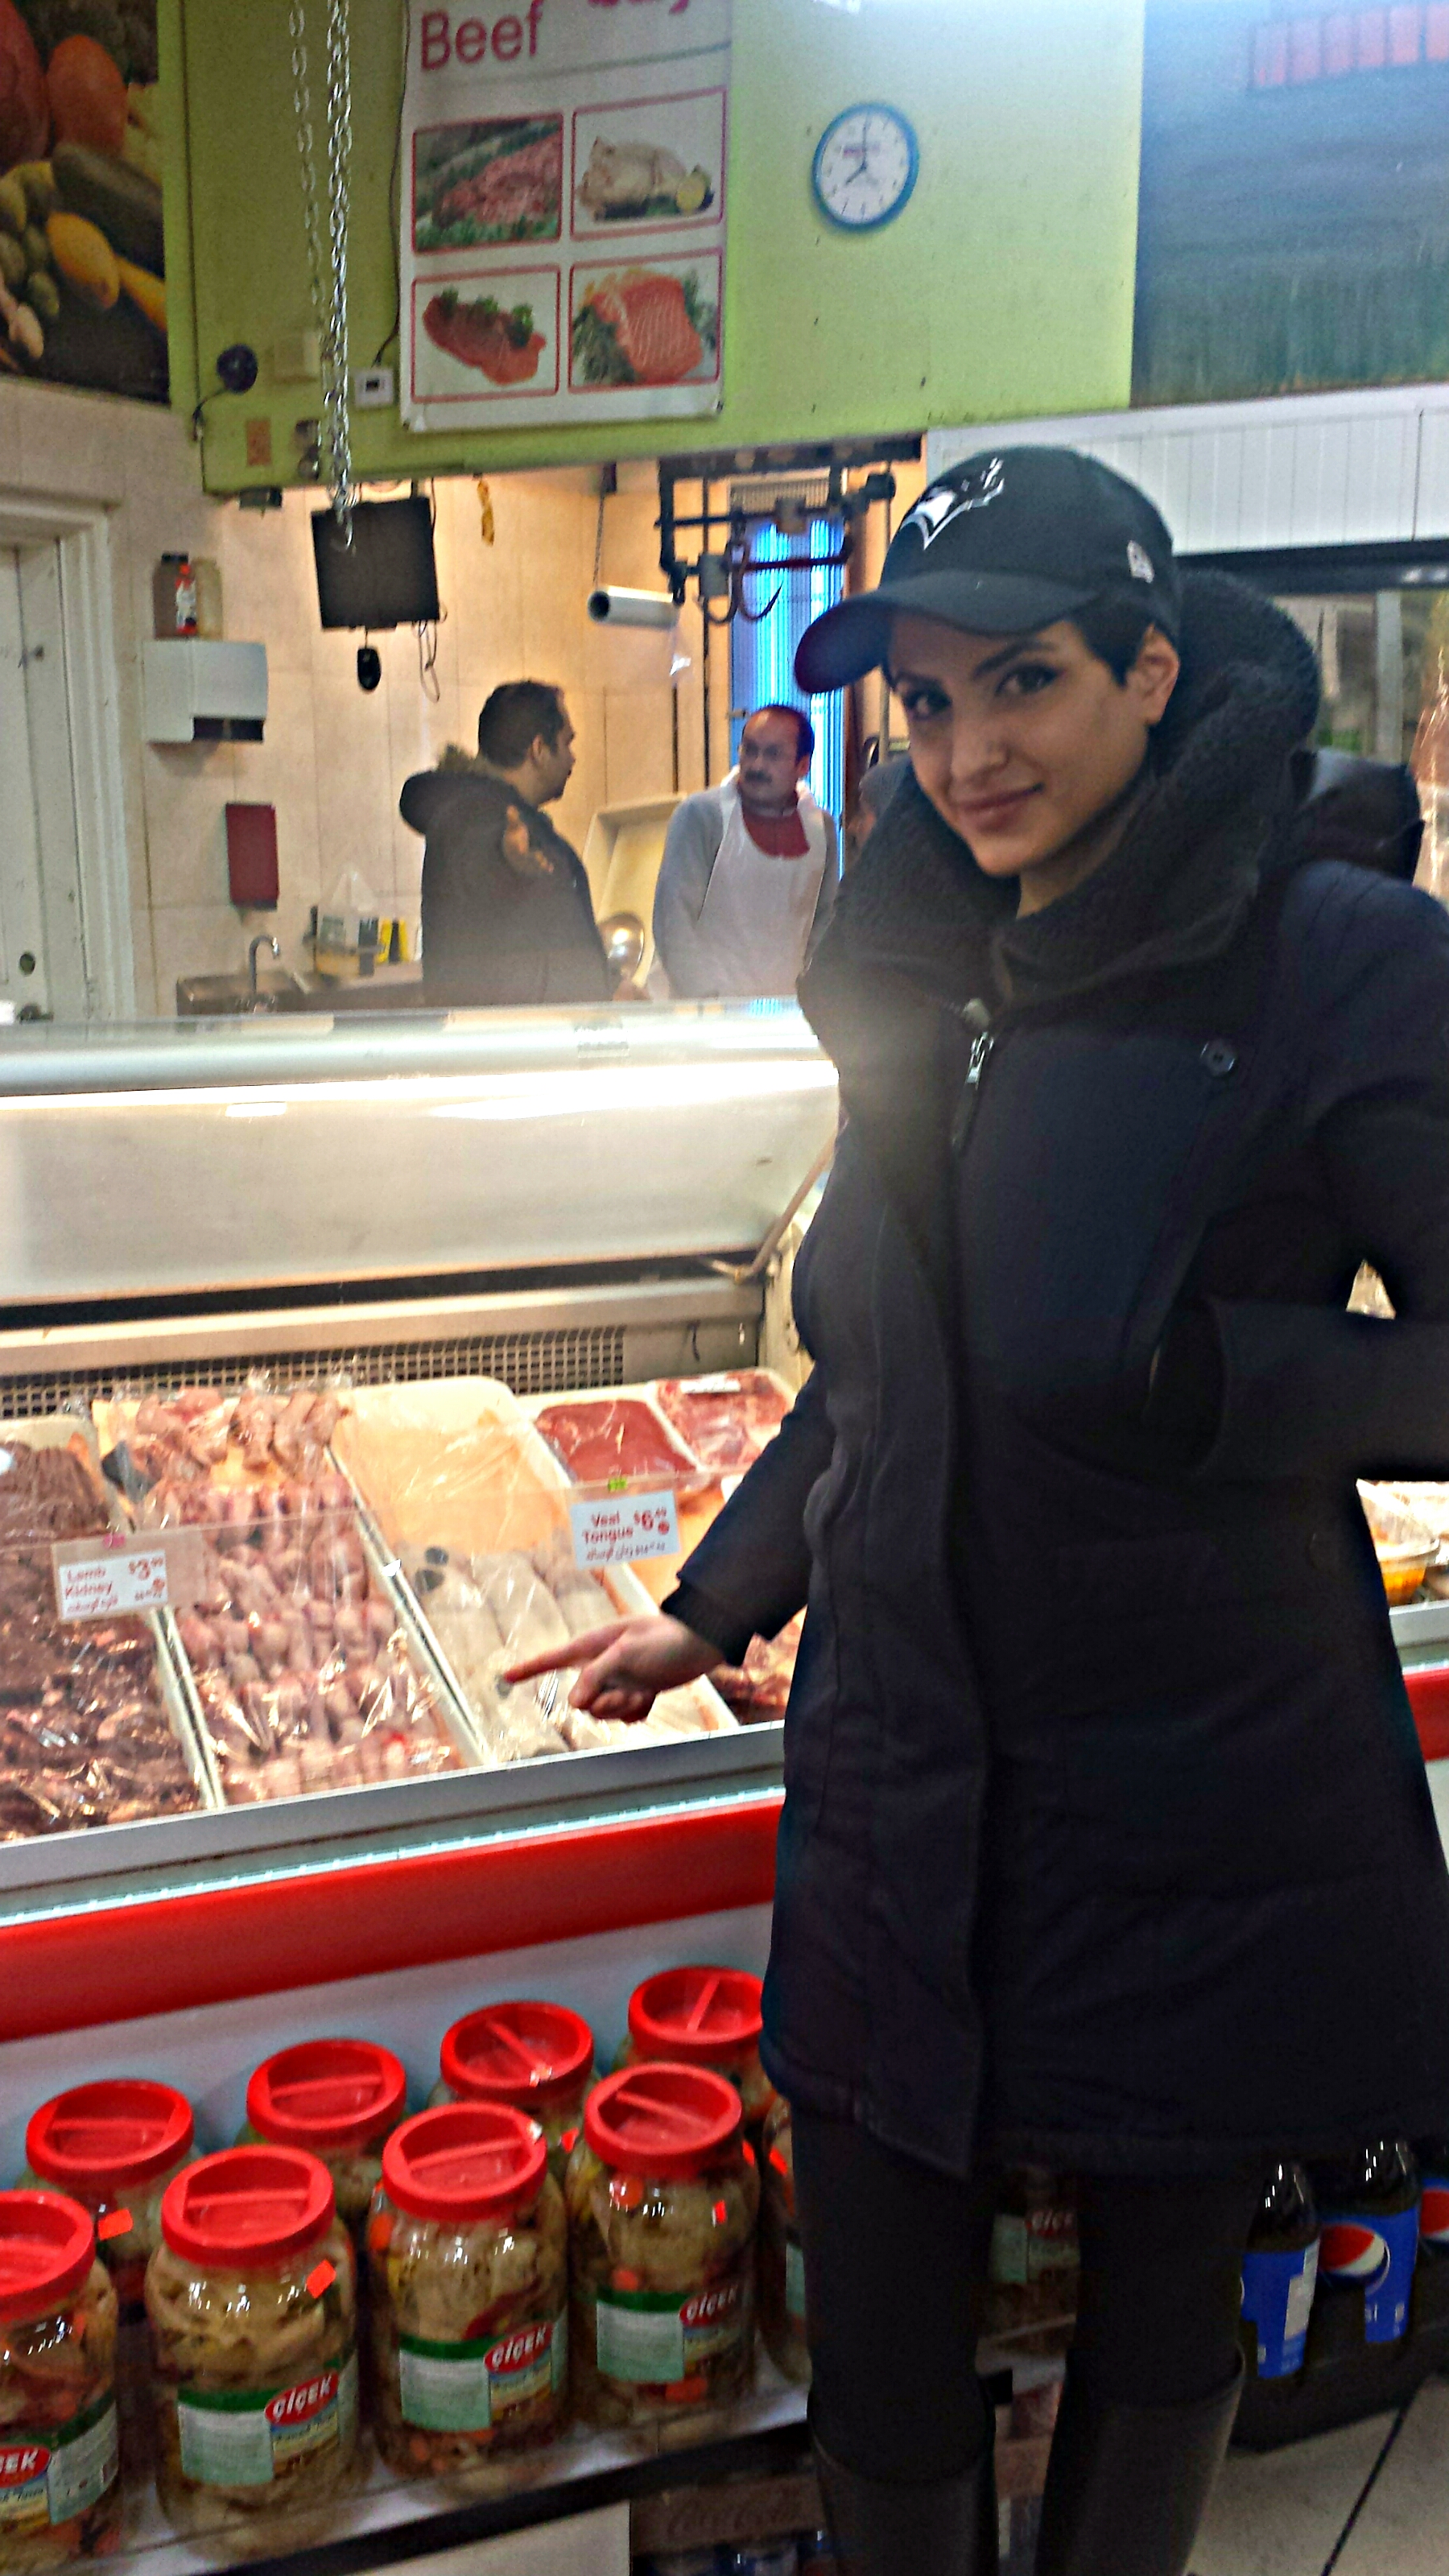
Grocery shopping thoughts: The paleo diet is expensive! What cost the most was not the fresh produce, but the meats, the nuts, and the fats. I’m not saying meat is generally inexpensive, but high quality meat (whether it is grass-fed, pastured, or organic) is very, VERY expensive – especially for a student on a budget. Likewise, nuts, especially of the natural/organic variety, is are very expensive. Fats, in particular organic coconut oil and avocado oil, are pricy too! The redeeming fact about the cooking fats is that I wouldn’t have to buy them on a weekly basis – a jar of coconut oil and a bottle of extra virgin olive oil should last me at least a month or two.

Meal planning & prep:

Breakfasts: I decided to bake a large frittata and a sweet potato hash to have as a quick breakfast throughout the week. The frittata included spinach, caramelized onions, bacon, and a carton of eggs.The sweet potato hash was simply cubed sweet potatoes pan-fried in some coconut oil with minced garlic and paprika. I was excited to have it for the week!

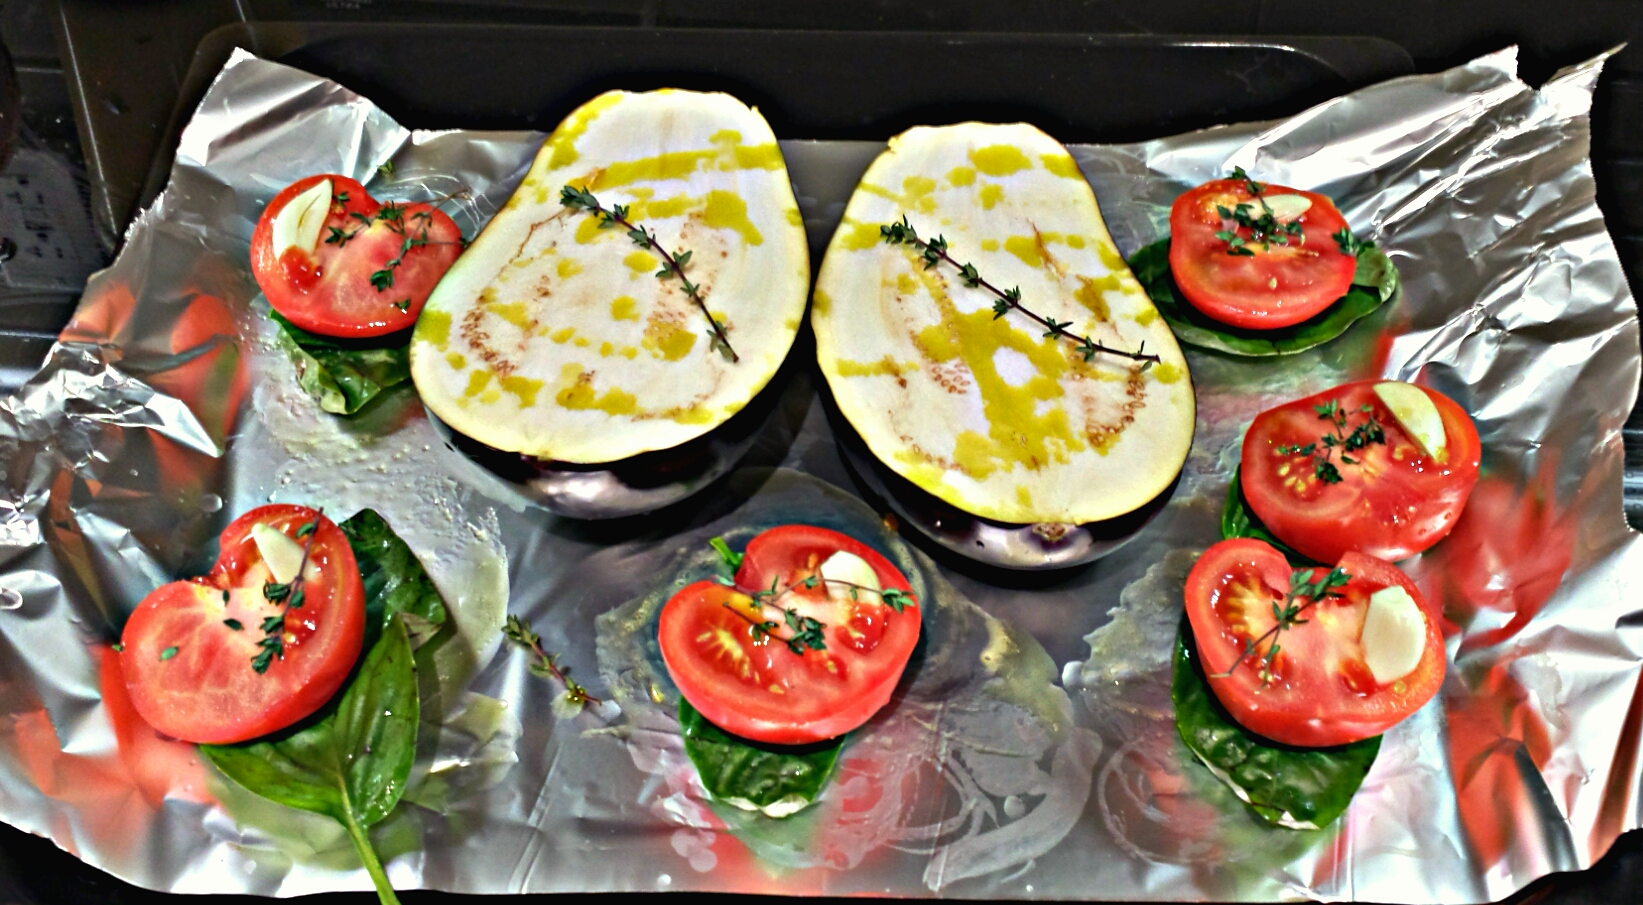
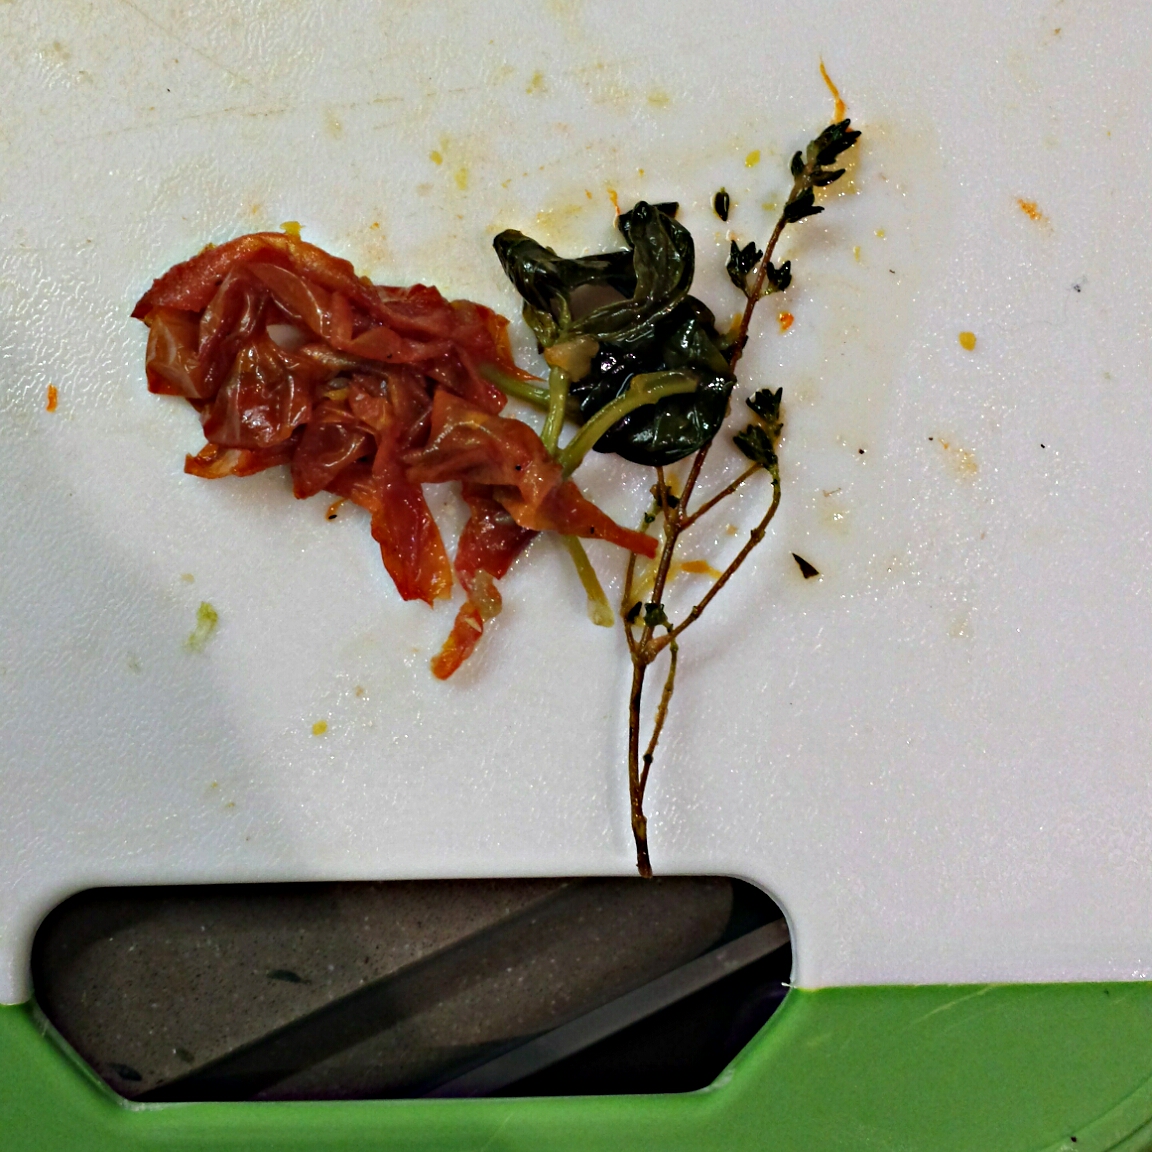
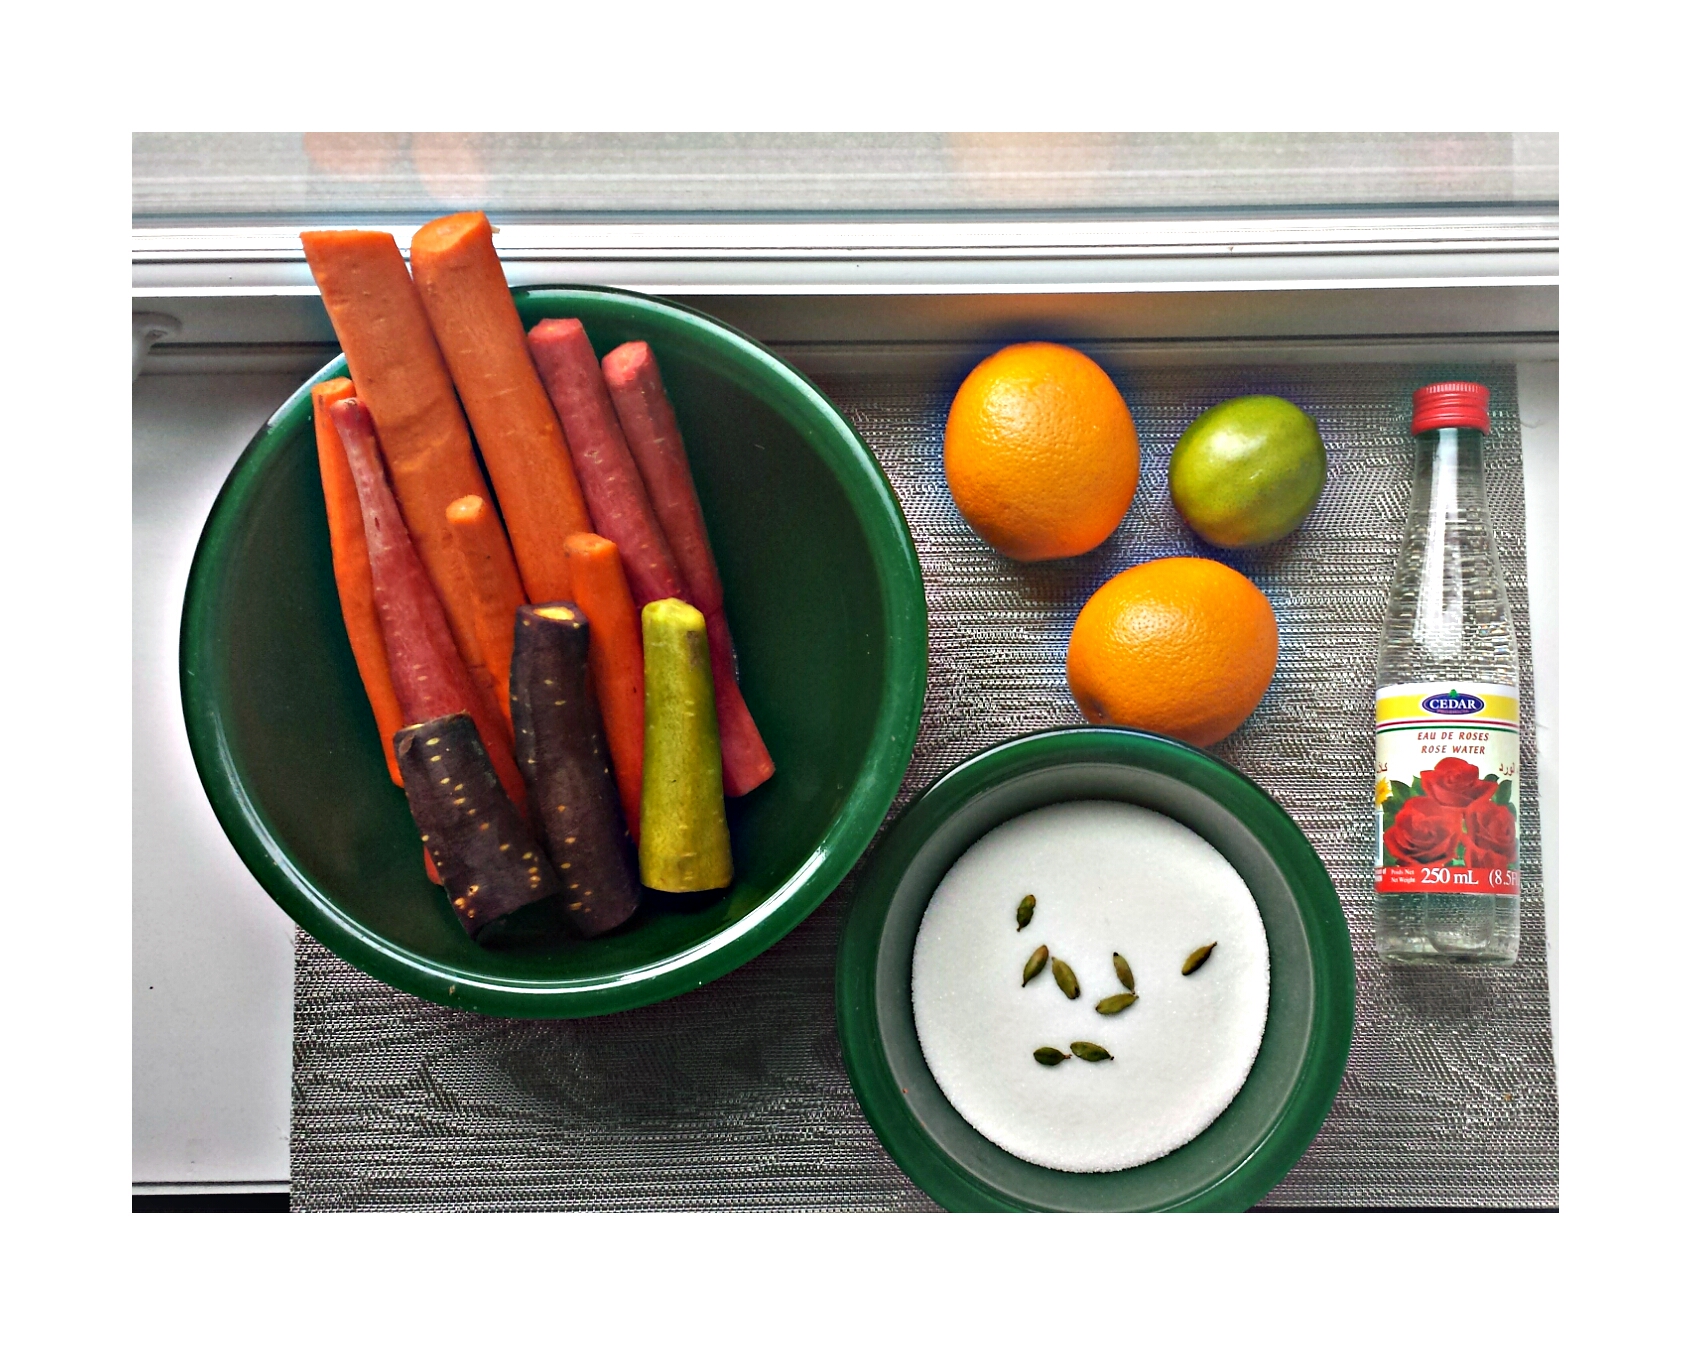
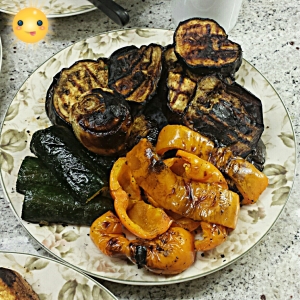
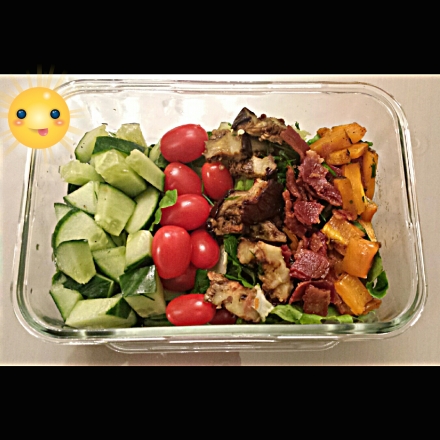
Lunch: I decided to make myself a salad for lunch every day. I had plenty of greens on hand (kale and arugula) and a variety of vegetables, fruits, and nuts to top it with. I grilled some veggies (pictured below) to ad to my salads for extra flavour. 

PicsArt_1404923303900

I also hard boiled half a carton of eggs to have as a protein with my salad, but had prosciutto and canned tuna as options to top them with as well. Olive oil and vinegar or lemon juice would be my dressing.

Dinners: After all that prep, I was too tired to prep dinner for the week, but planned what I would make on Monday for the rest of the week. 1 – A hearty beef chili (bean-less), and 2) a whole pan roasted chicken with root vegetables.

Snacks: Nuts & fresh fruit

Monday:

I was pretty excited on Monday to eat my prepped frittata and sweet potato hash. Lunch was good too – I felt satisfied and full. My sweet tooth kicked in, and as much as I wanted a cookie, I decided on a piece of fruit for dessert instead.

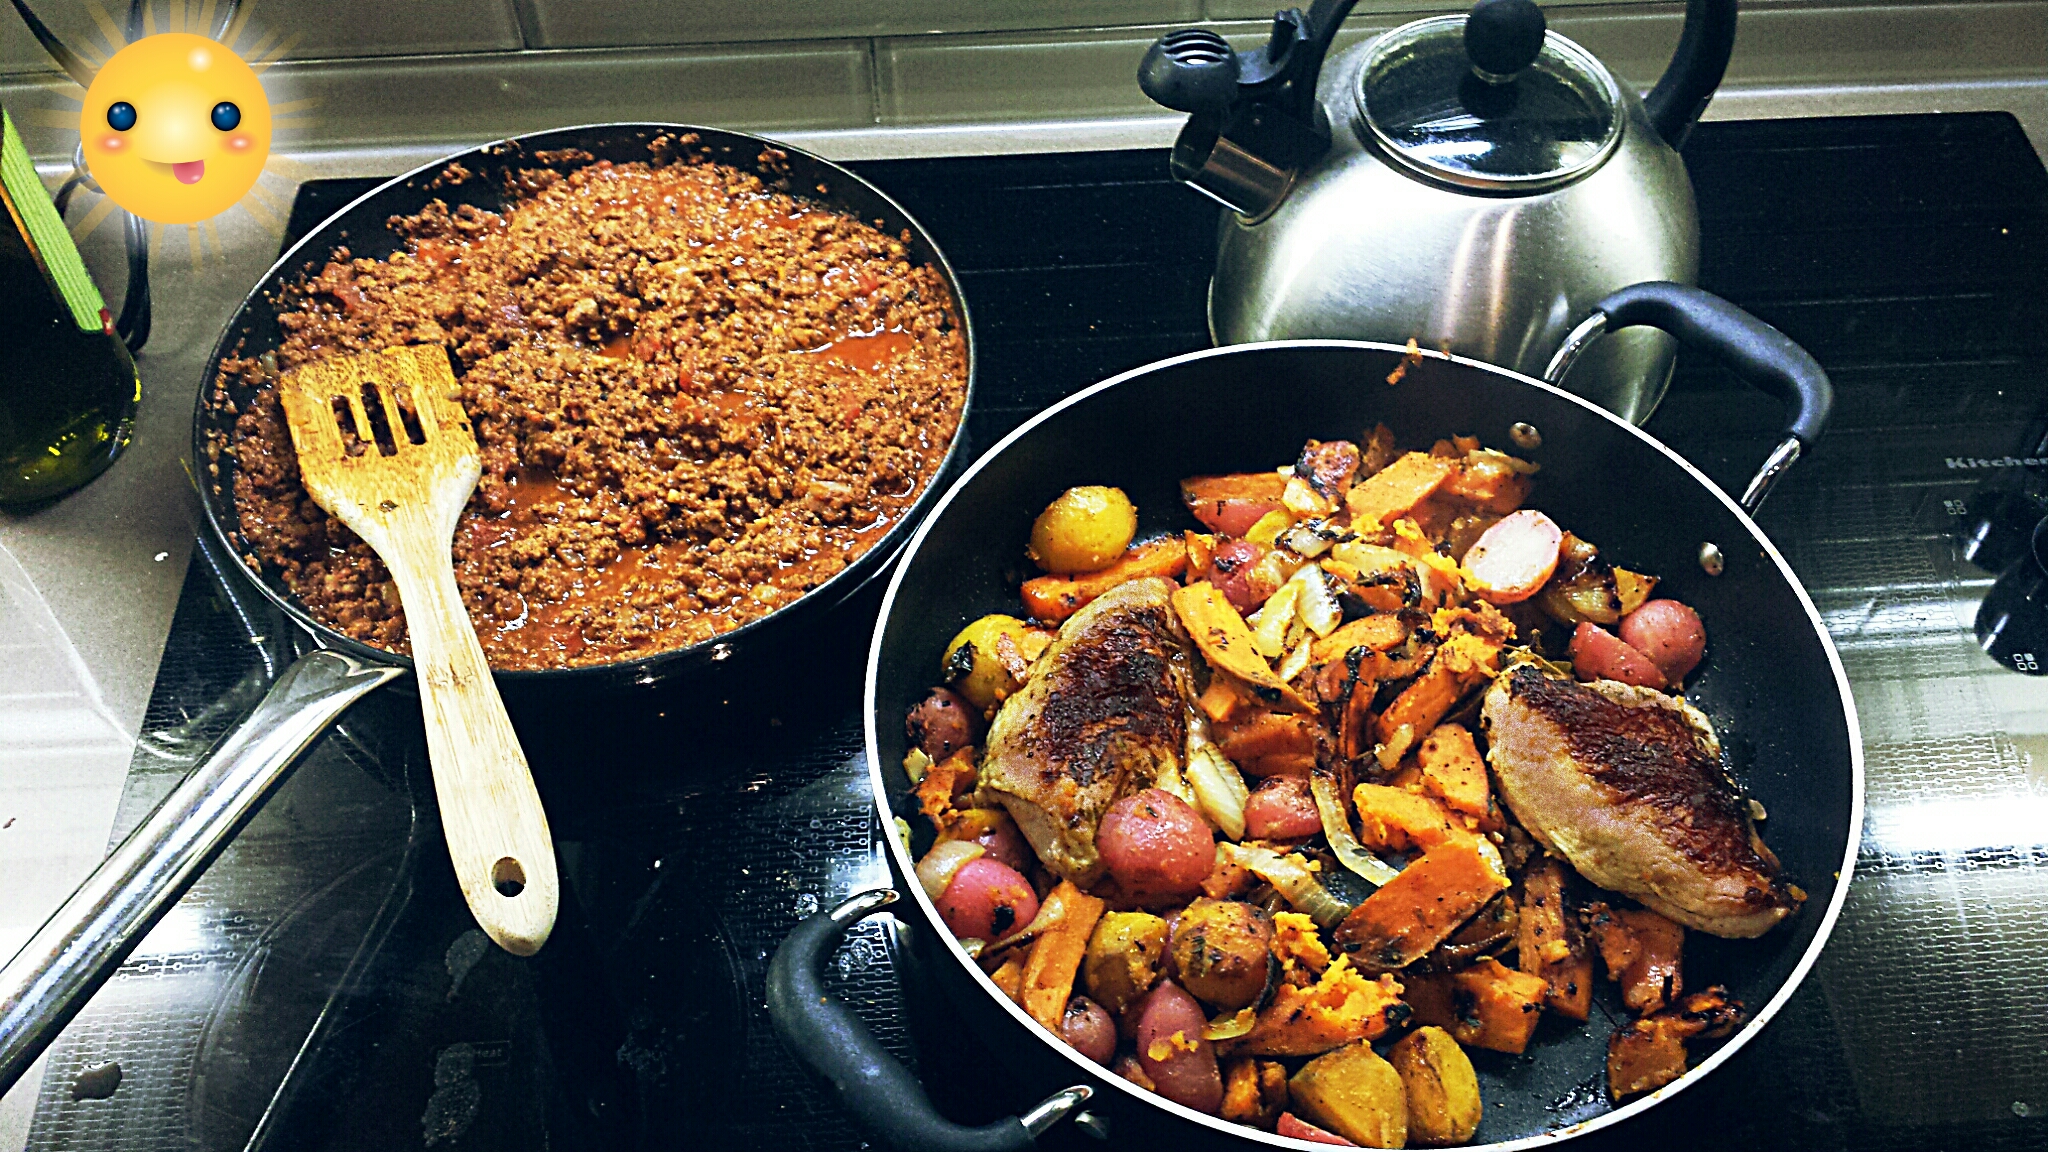
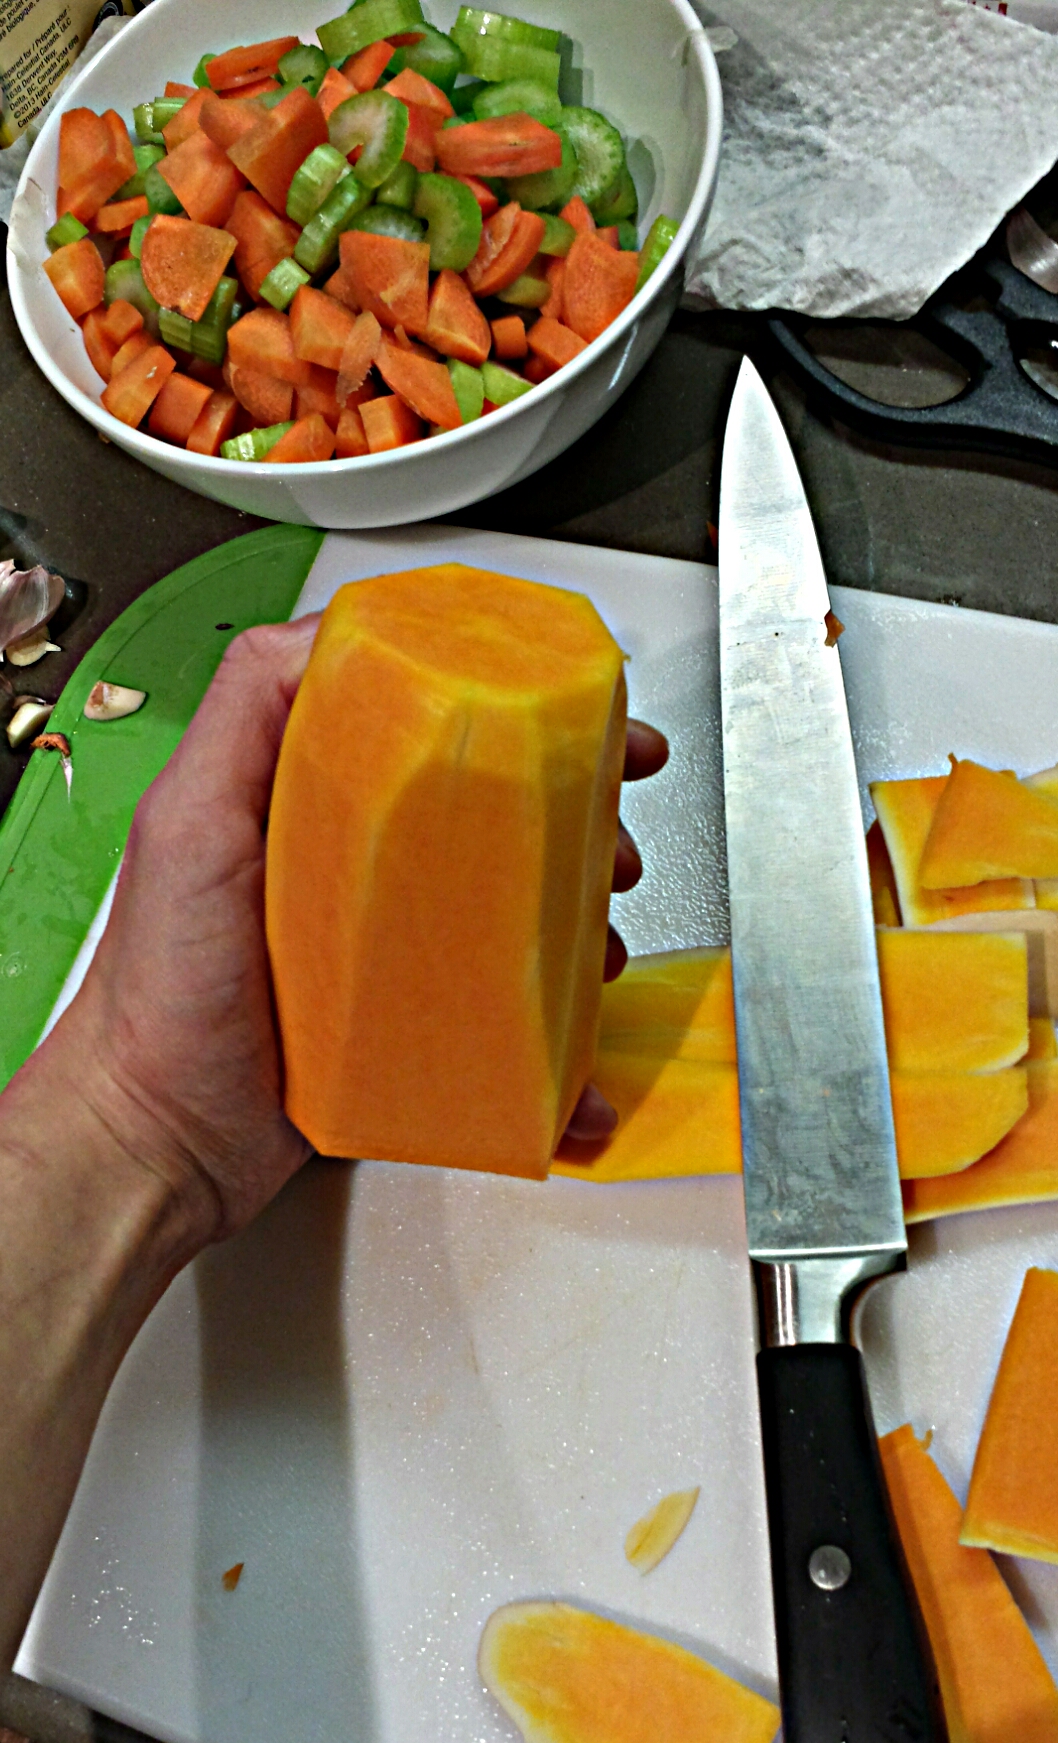
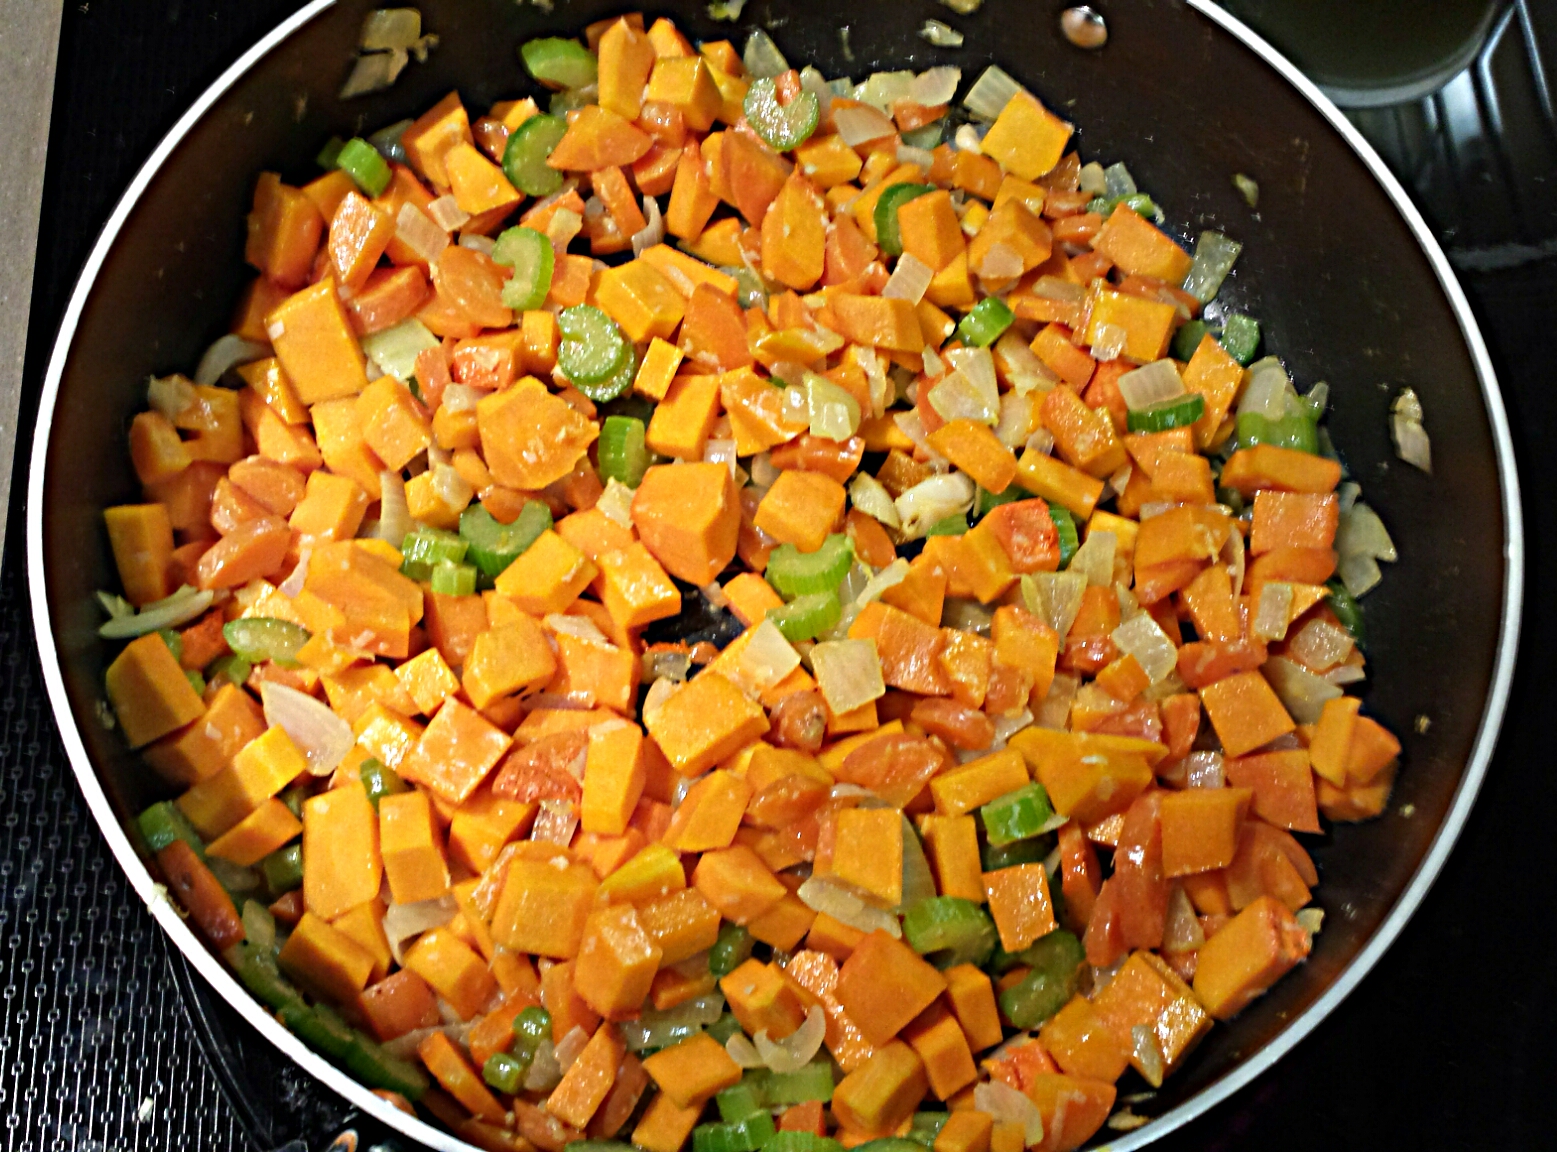
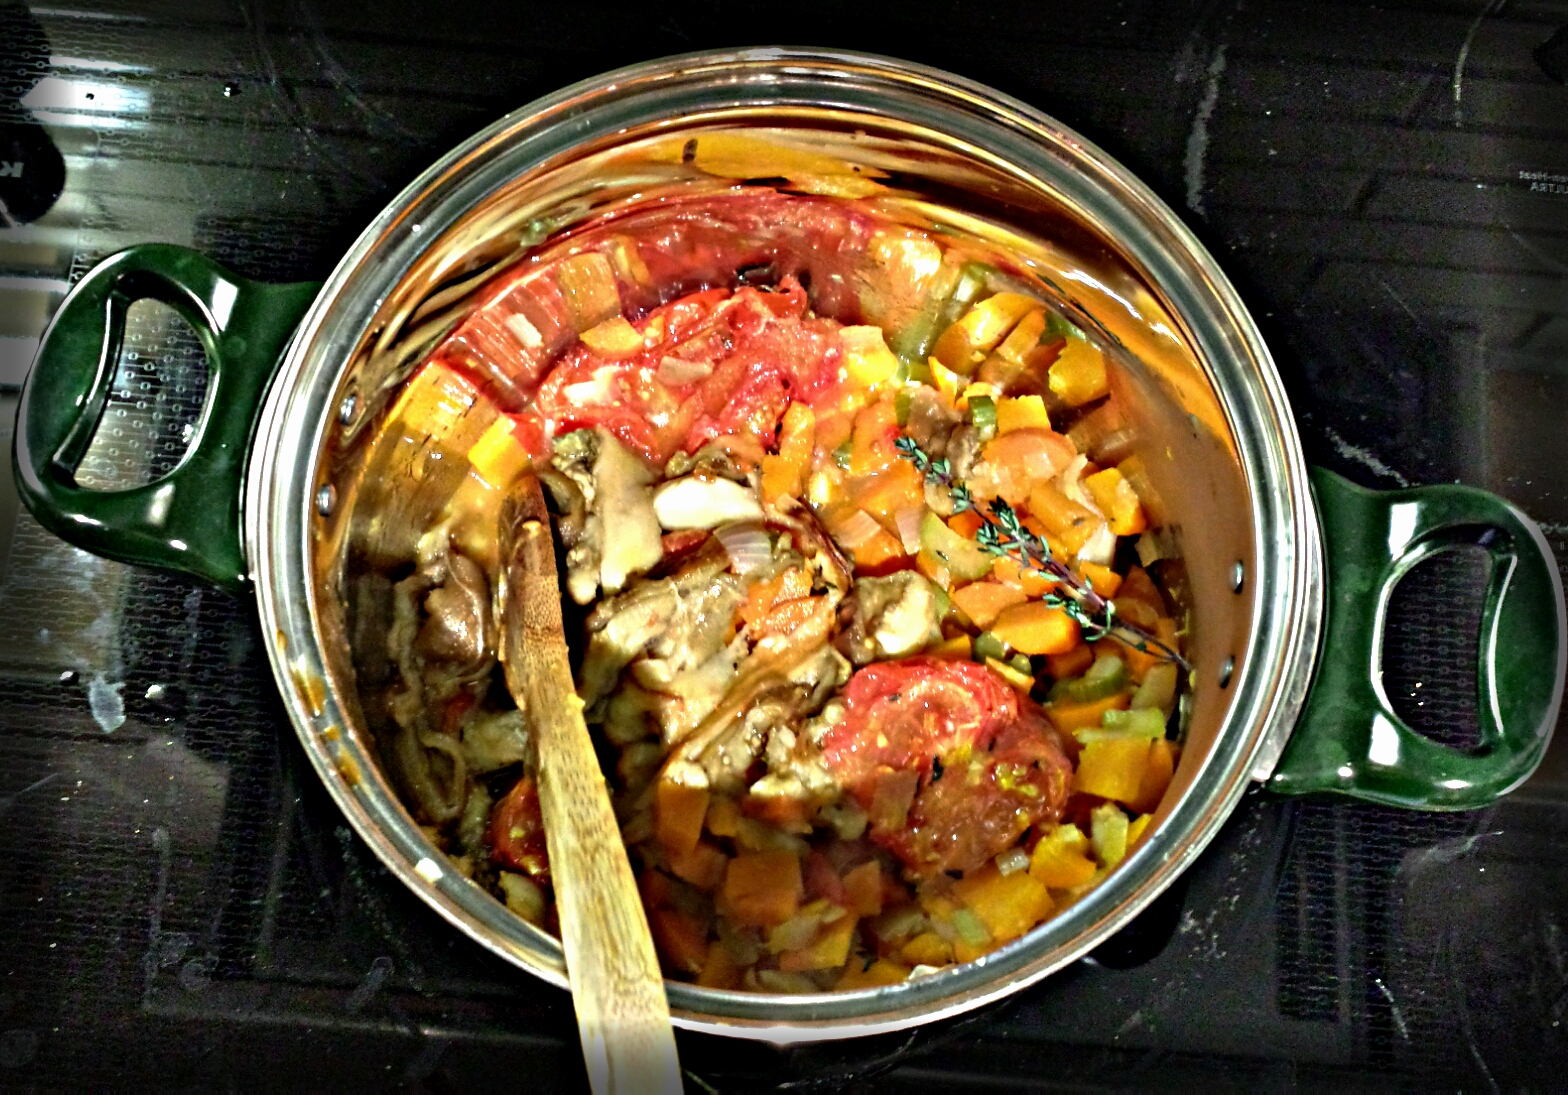
I prepped my beef chili and pan roasted chicken. Here are the photos of it below:

PicsArt_1412643385588

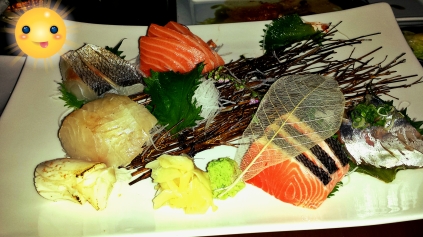
I decided to keep the chili and the chicken for the remaining days of the week, and went out to dinner with my boyfriend. We went to a sushi restaurant as per my request so I could get a paleo friendly food, which was sashimi – no additives, no “bad” oils, no rice, straight protein – this is as paleo as it gets! I skipped on the soy sauce (not paleo) and brought my own coconut aminos (paleo friendly). It felt good knowing I could go out to eat and get something paleo friendly without having to ask for substitutions, but I did still have to bring my own dipping sauce. I realized it would be hard to eat paleo on a whim – I had to plan to bring my own coconut aminos to fully enjoy my meal, because I wouldn’t have enjoyed the sashimi without a soy-like alternative.

My sashimi dinner (at Yuzu No Hana Restaurant):

IMG-20150117-WA0001

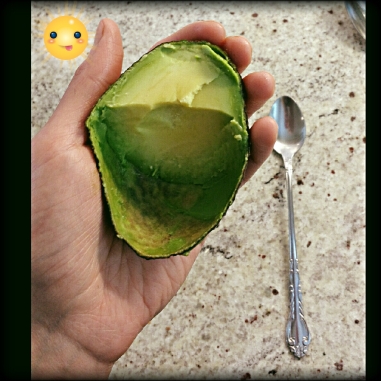
When we got back home, I didn’t feel quite full – maybe from the lack of rice with the sashimi. I had half of an avocado as a night-time snack, which helped fill me up.

PicsArt_1404412325012

Tuesday:

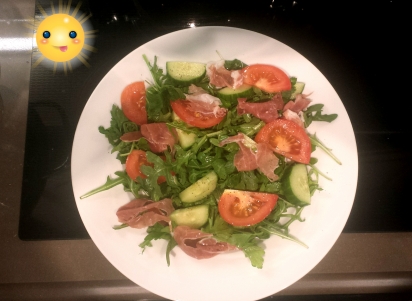
Tuesday went smoothly for the most part. I found myself craving oatmeal for breakfast in the morning, but felt satisfied after eating my frittata and hash. I changed up my salad for some variety – instead of hard boiled eggs for protein, I topped it with prosciutto. It was delicious! Here is my lunch salad:

20150130_073315

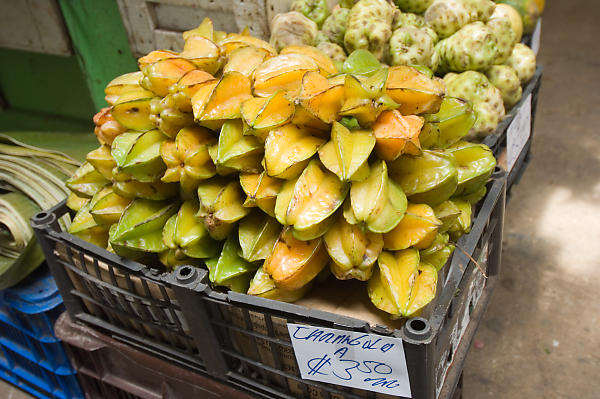
I also snacked on a massive pomelo, but only managed to eat half. It was huge!
PicsArt_1421001376701

Dinner was chili. It was still just as comforting and filling without the beans, and without bread as a dipper. I think I might always do bean-less chilies from now on, and I really didn’t crave or want bread on the side.

Wednesday:

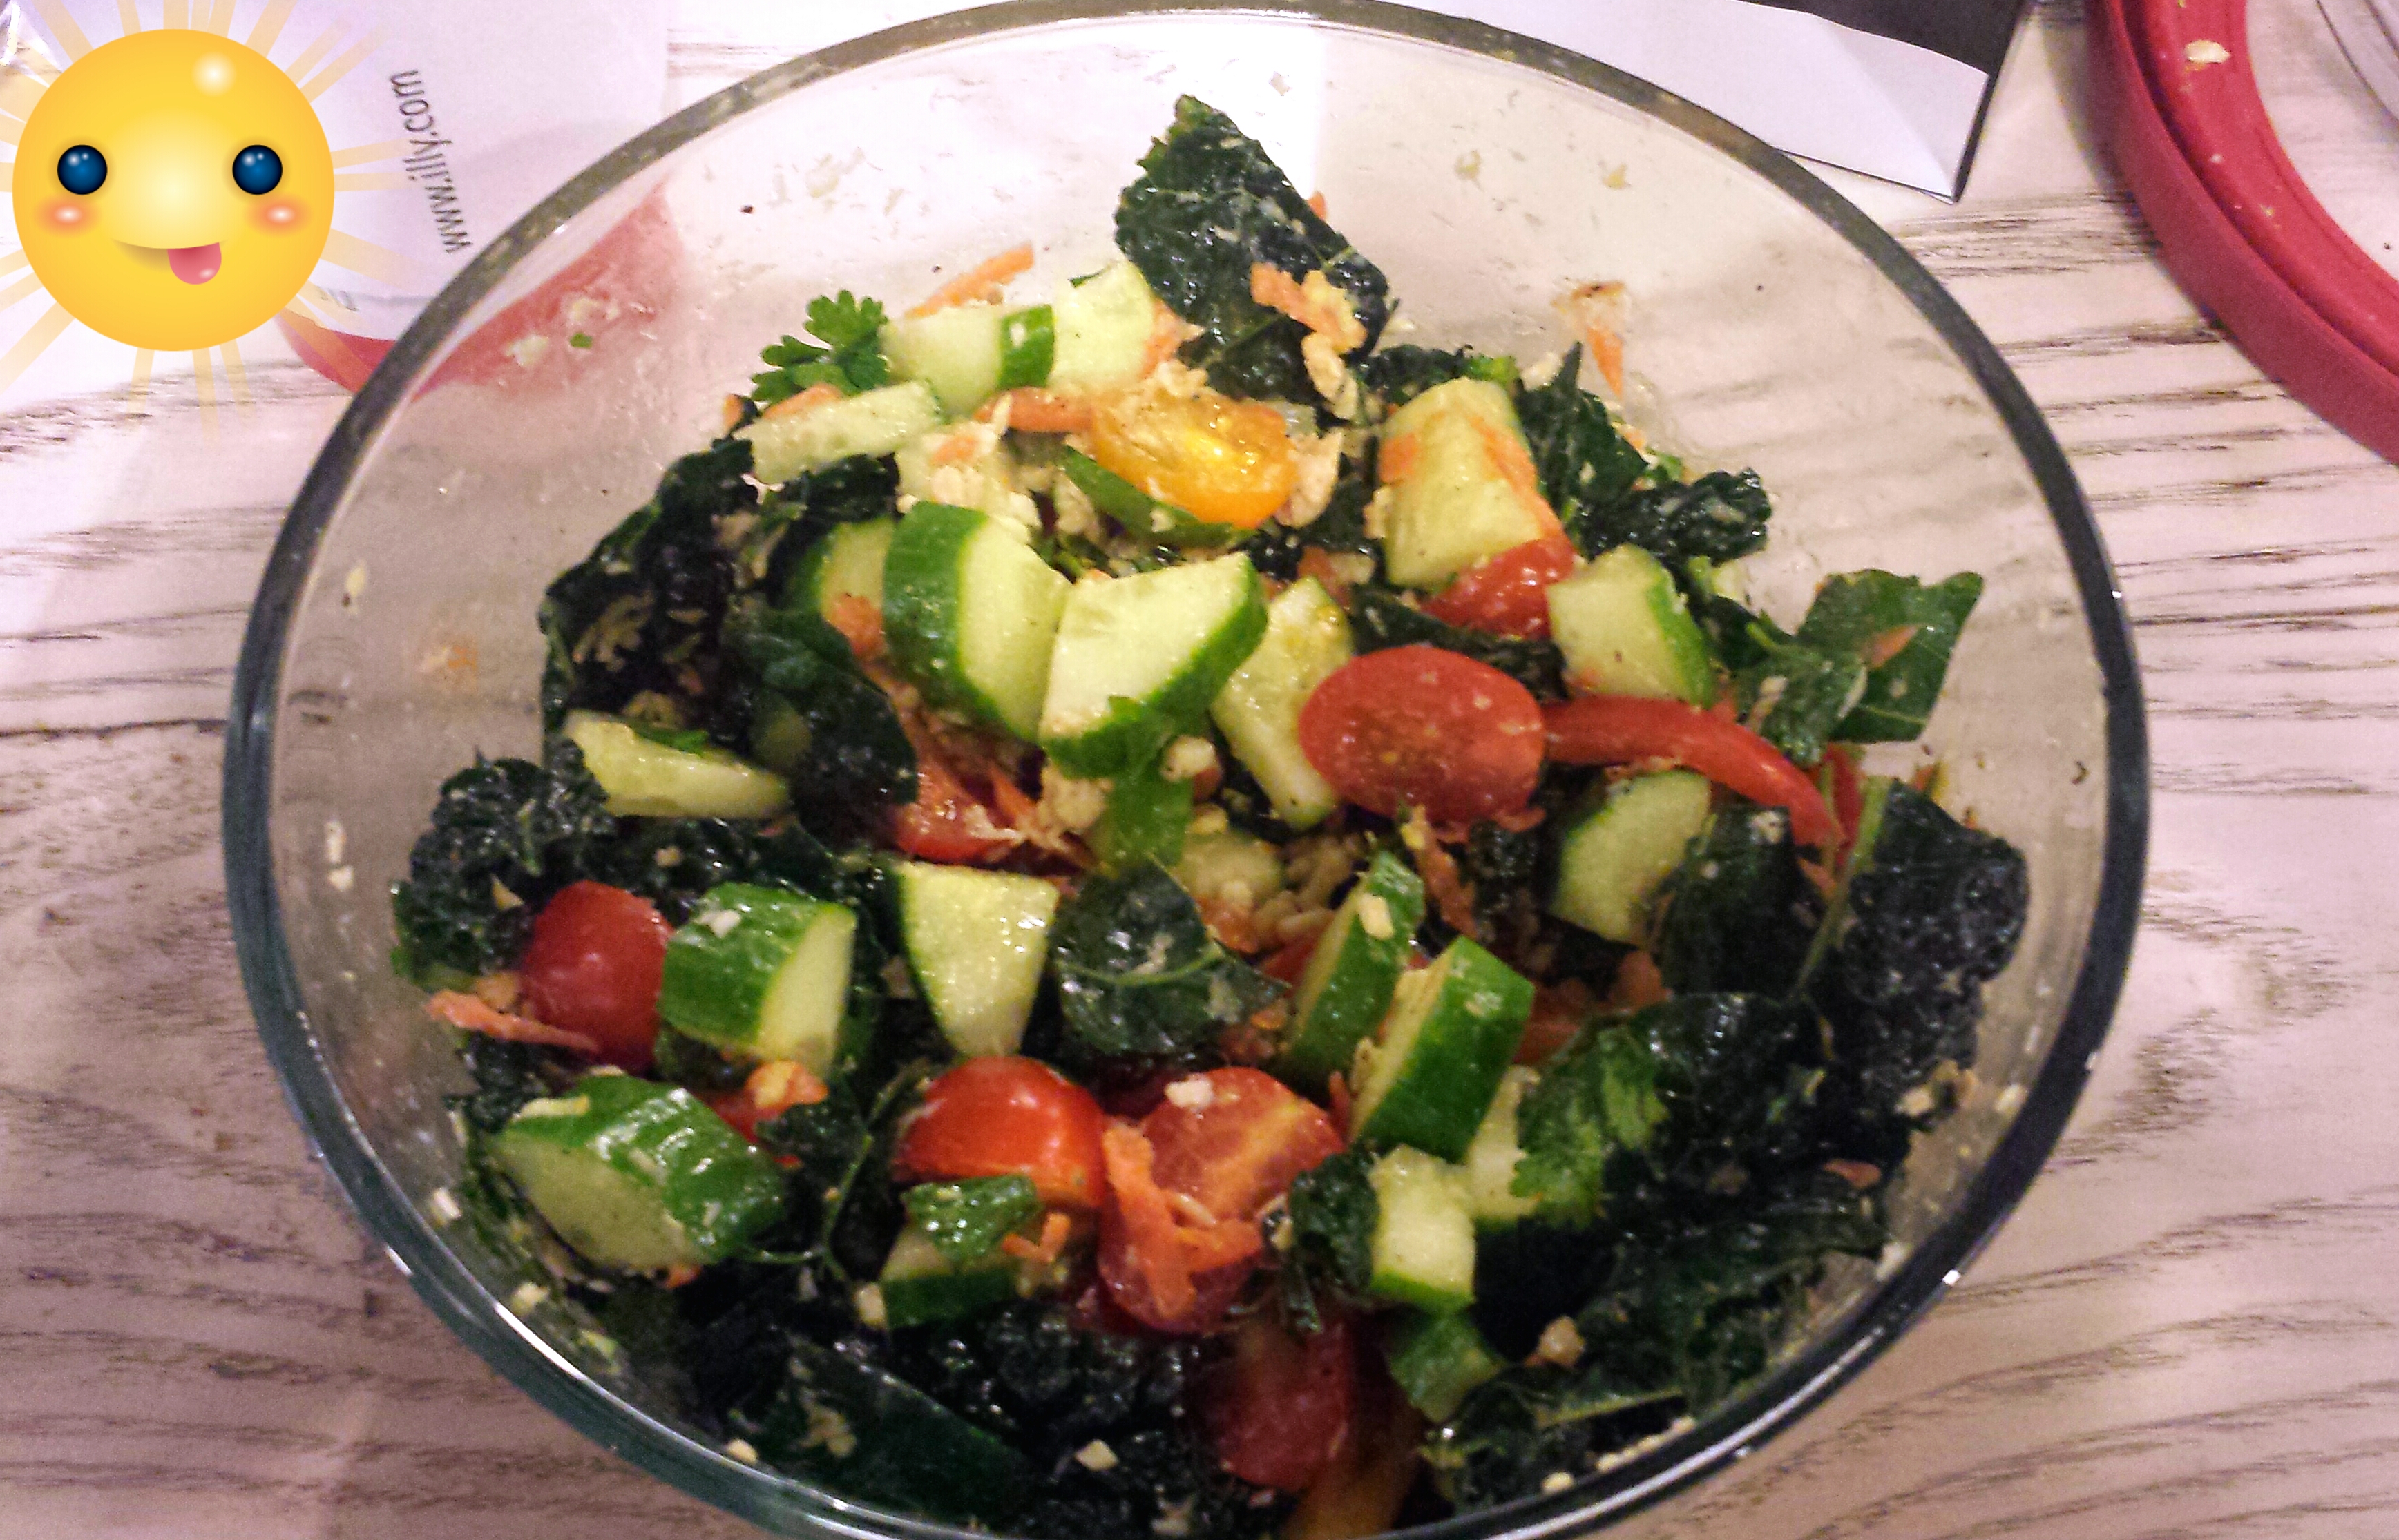
The day went smoothly, I had my frittata & hash for  breakfast, and a massaged kale salad with tuna for lunch. Here’s my salad:

20141122_153310

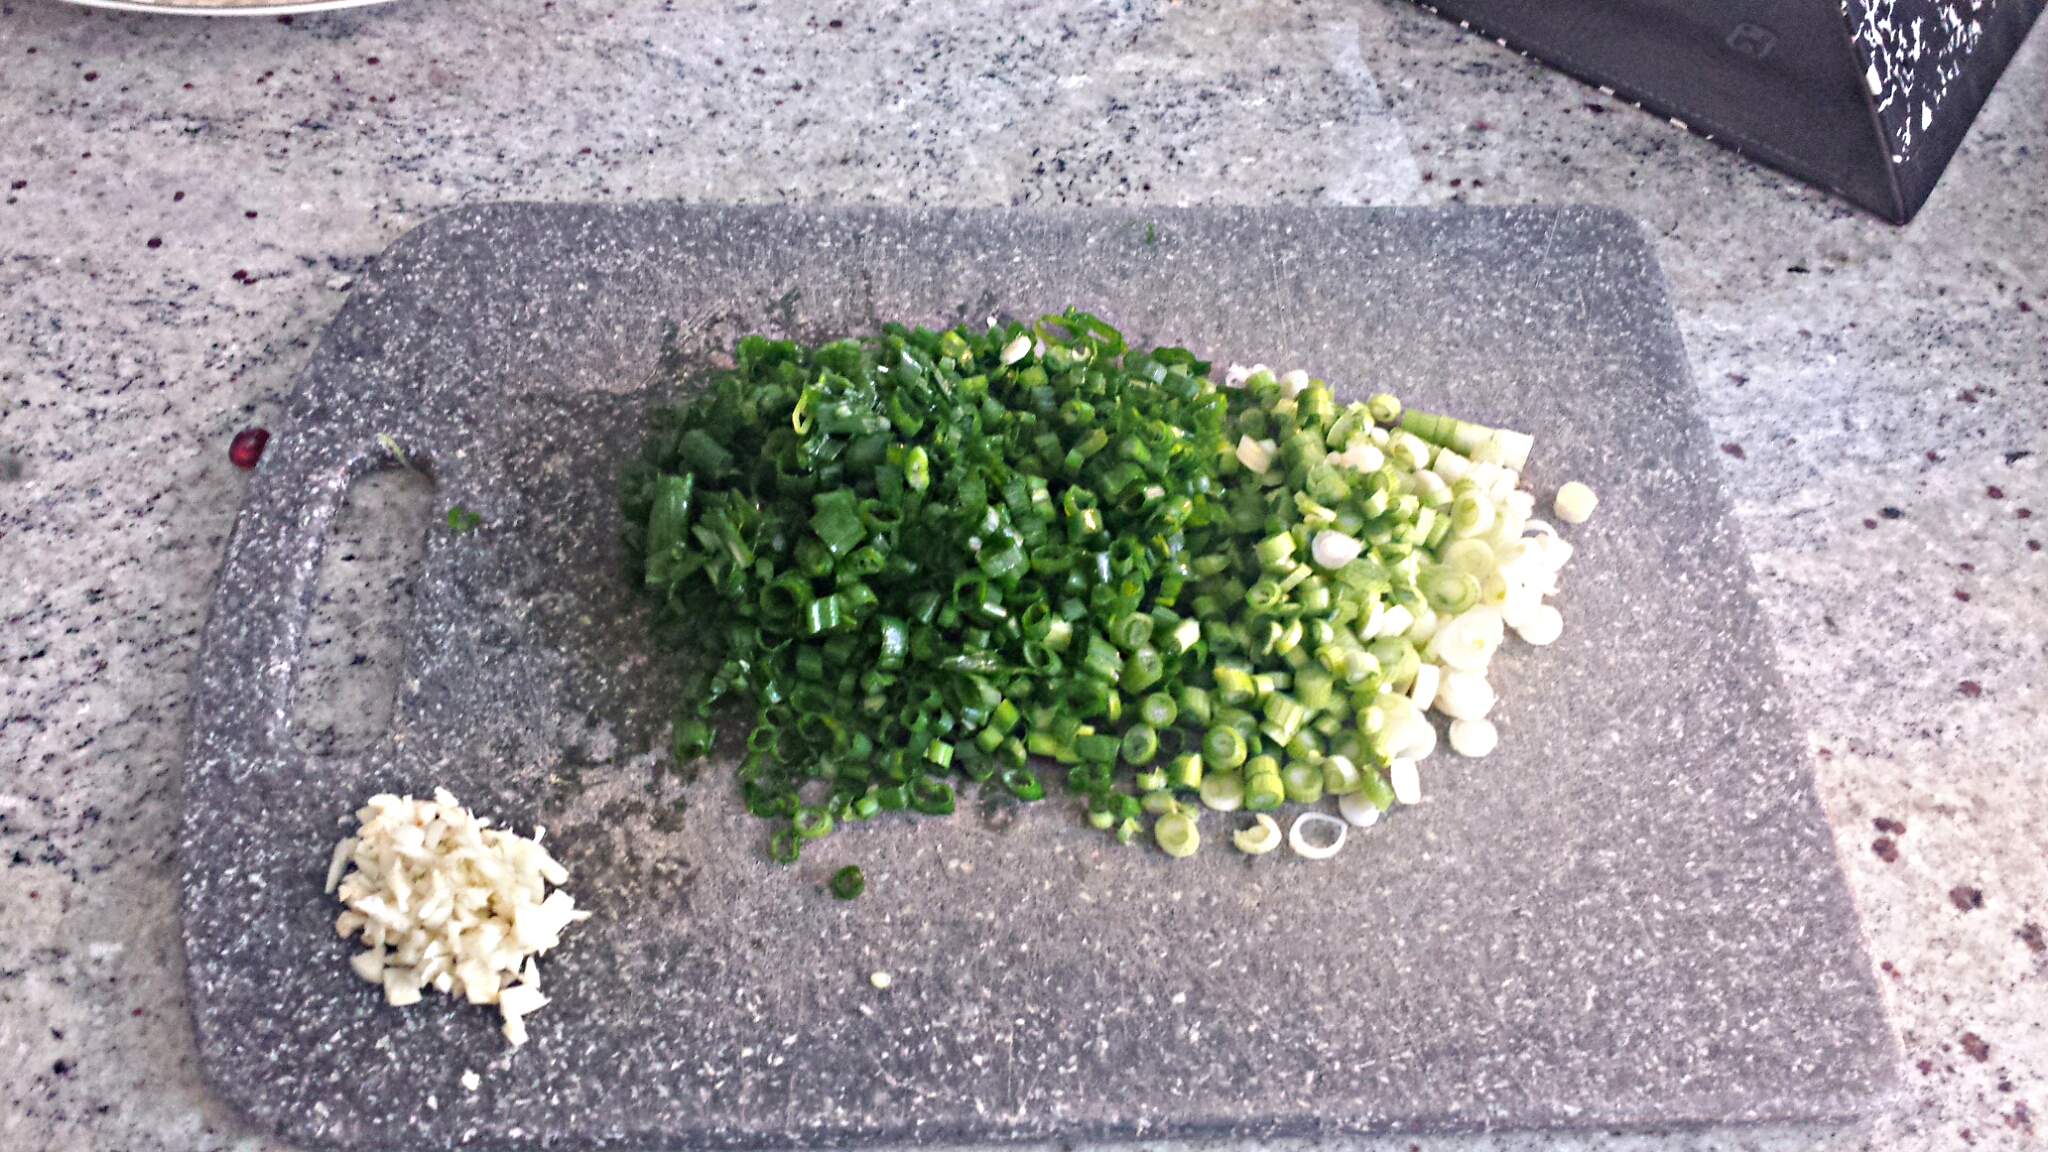
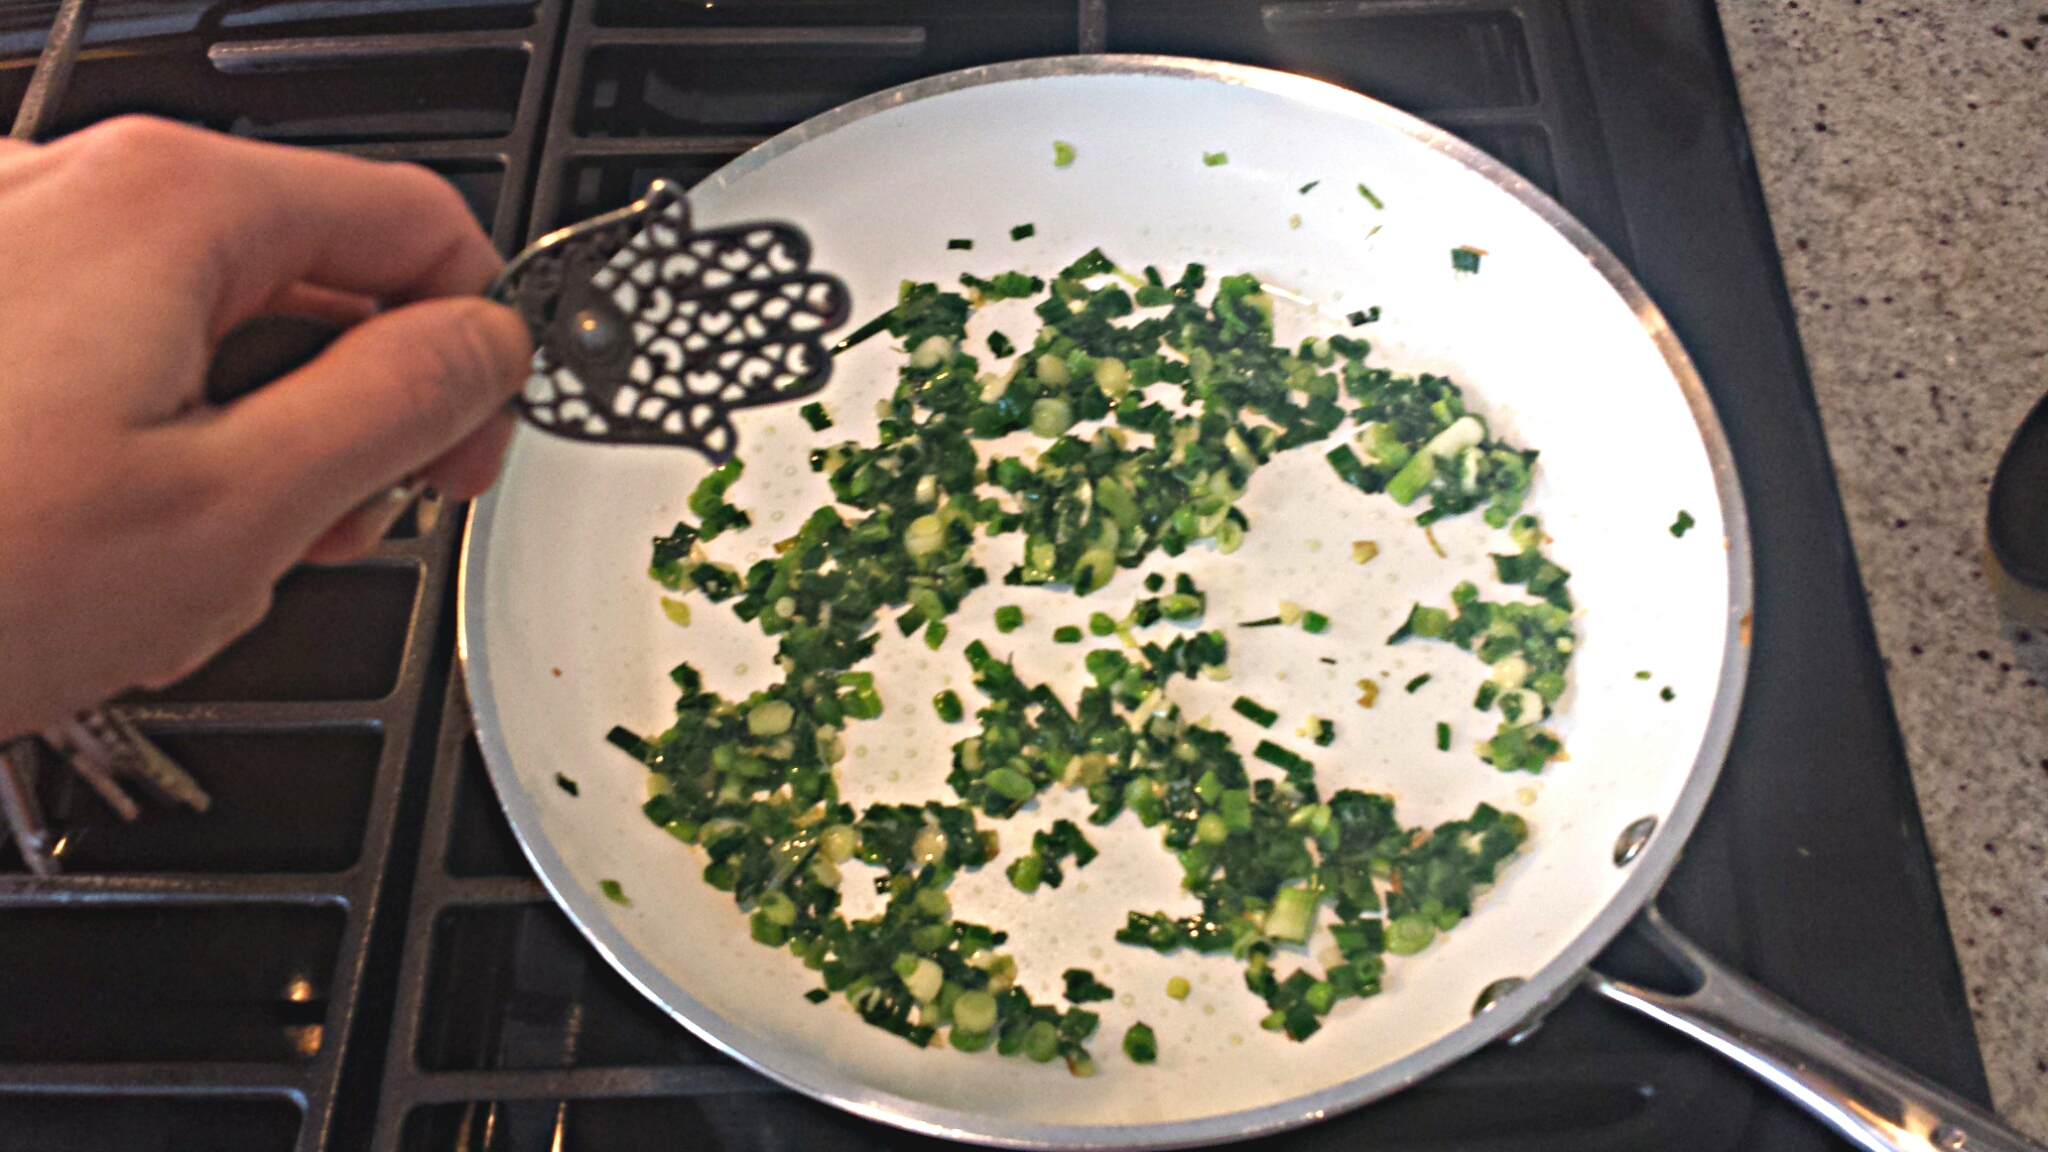
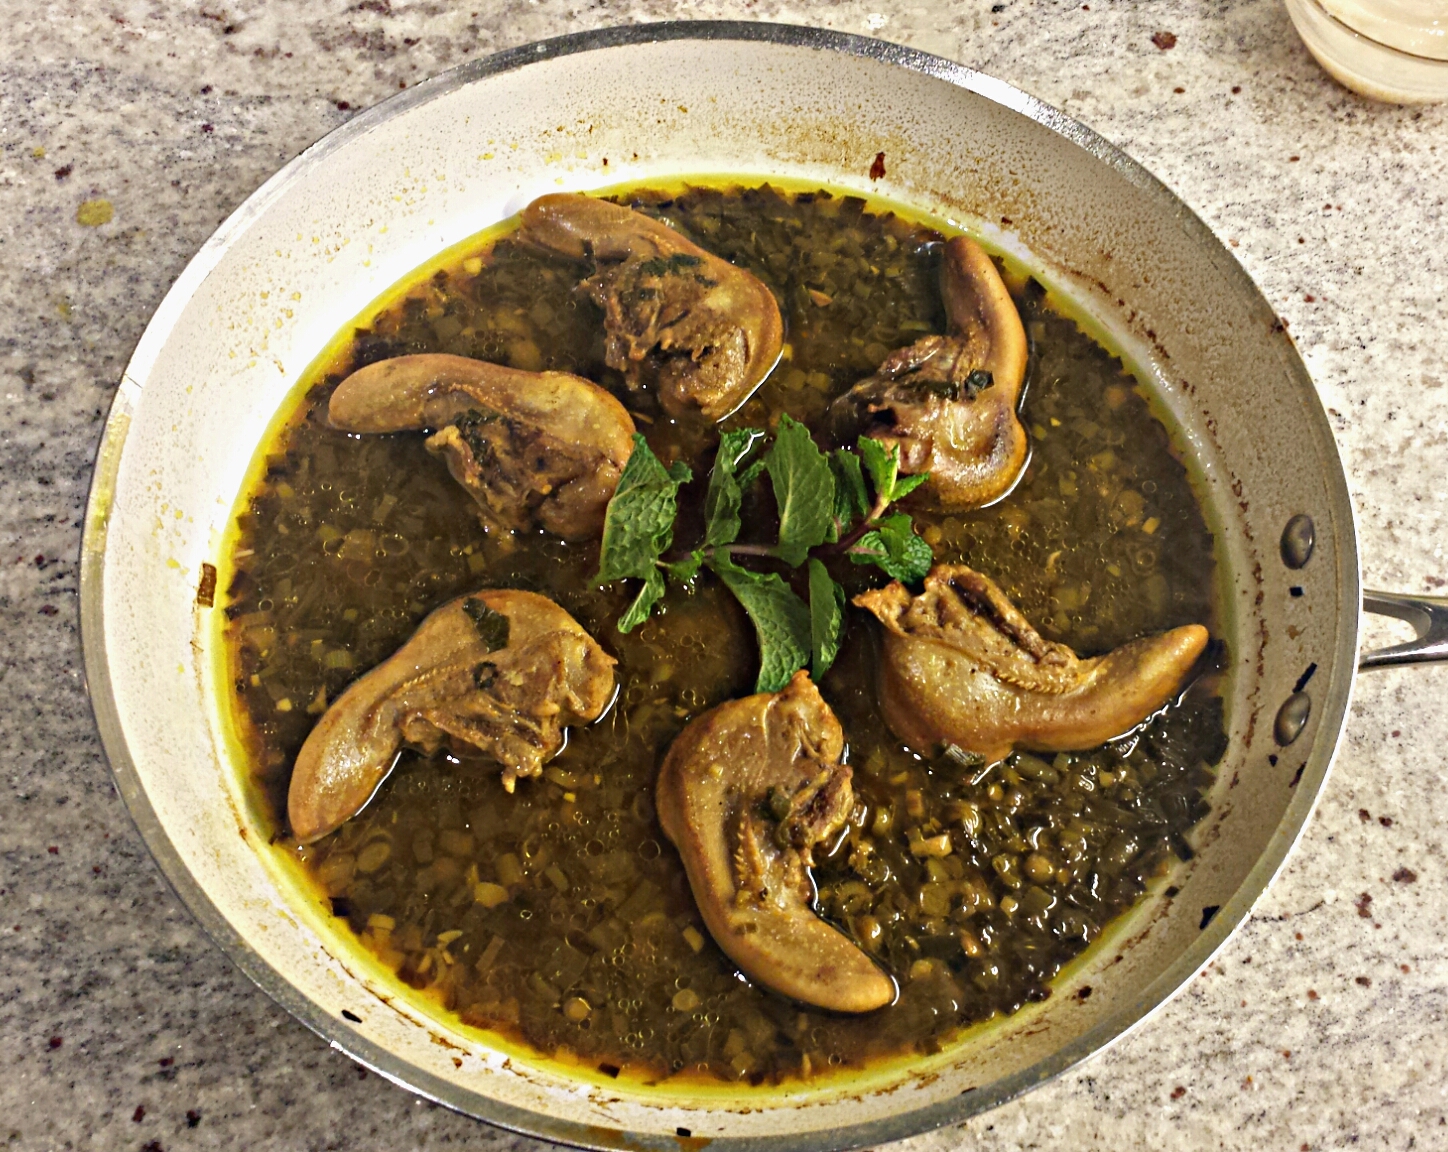
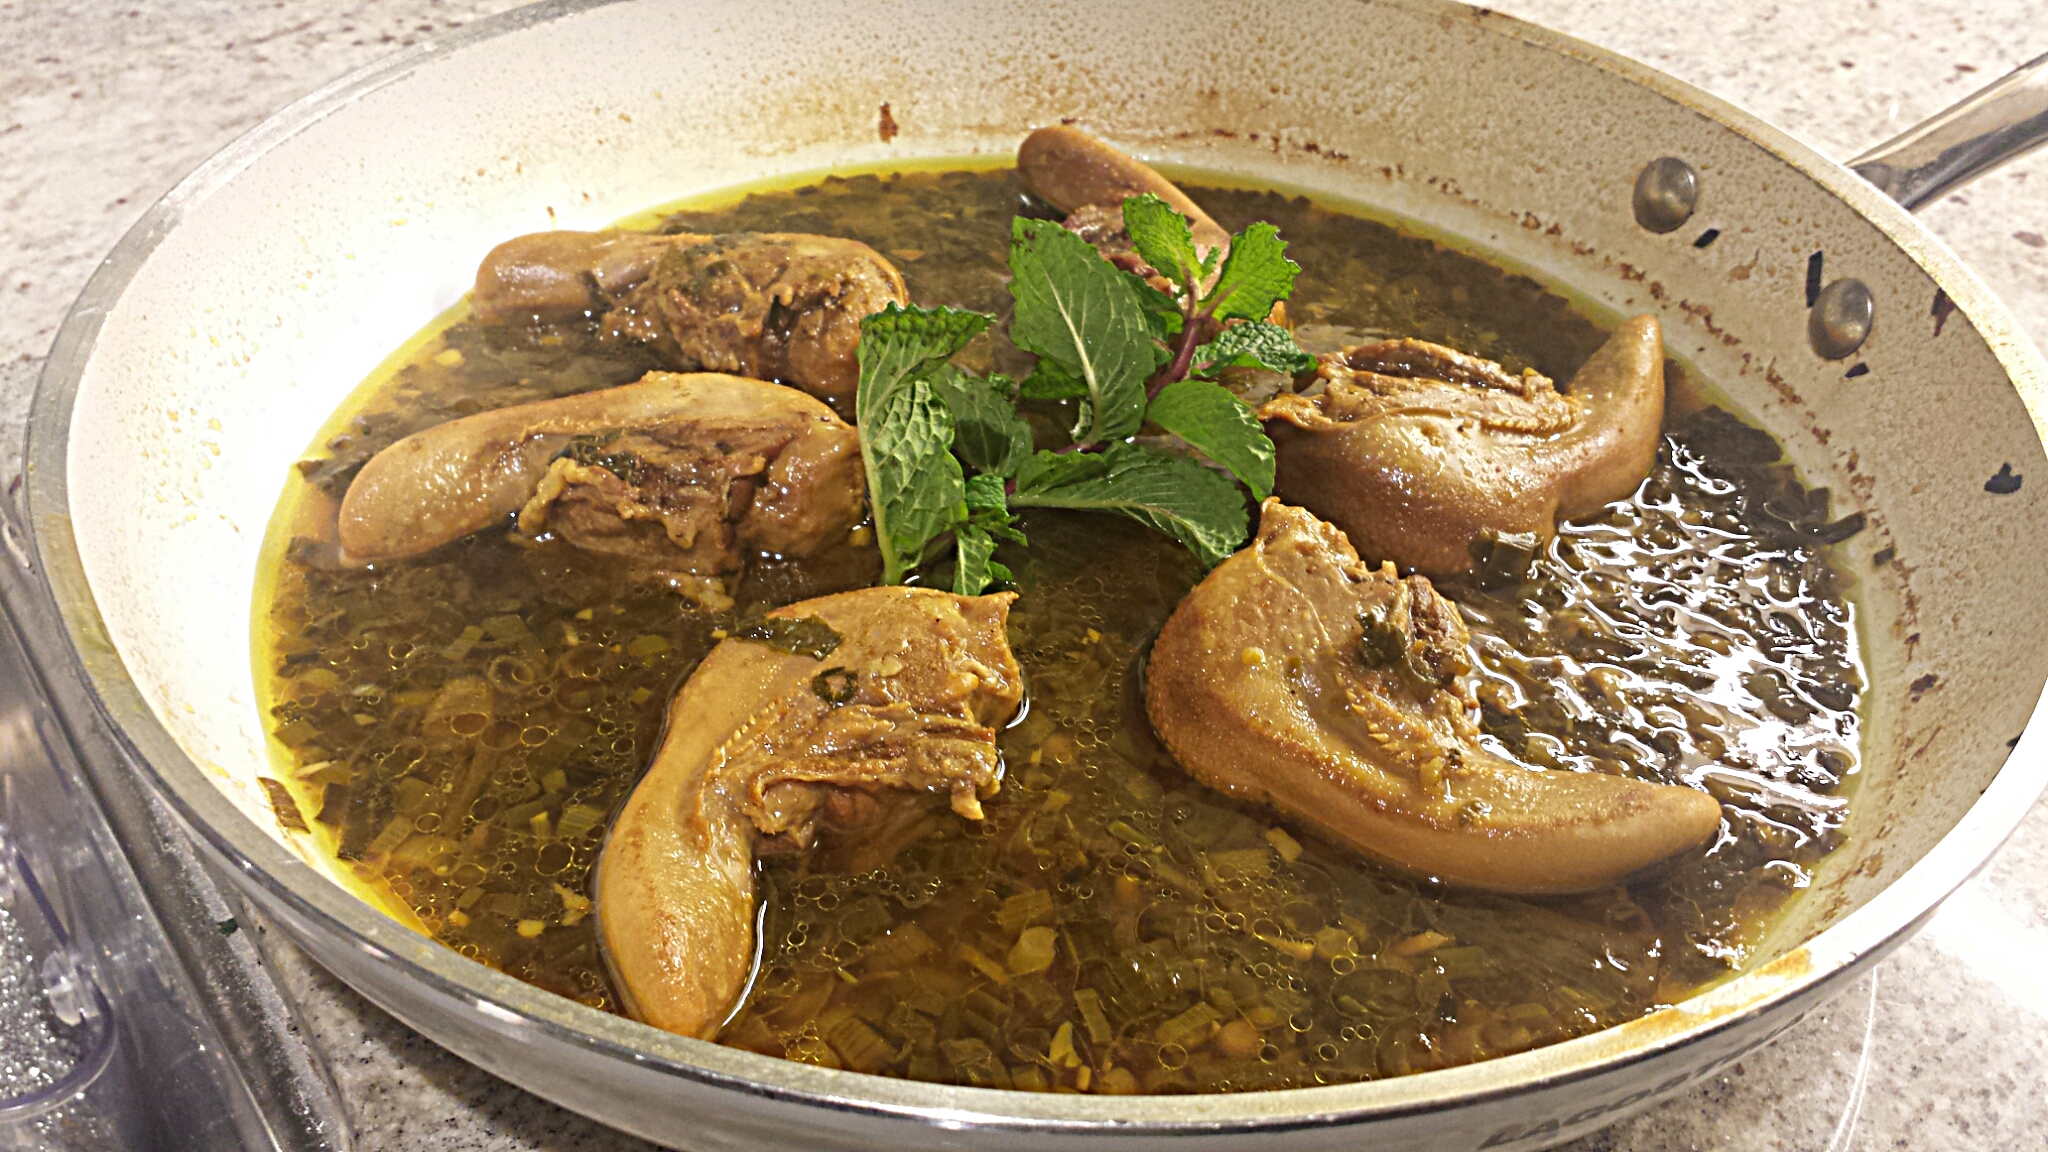
Things got rough once it was dinner time. It was my day off from school, so my parents invited me over for dinner. I felt bad that I had made an entire organic chicken that was still untouched in the fridge, but realized family time was more important than my meal, and I would figure it out. My mom had prepared an Iranian stew for dinner which is served with rice. I opted out of eating the rice, and just ate the stew, which included lamb, eggplant, tomatoes, onions, and herbs, with a salad on the side. Although the stew was absolutely delicious on its own, I never realized how much more enjoyable rice makes the meal. In my Iranian household, I’ve grown up my whole life eating rice as my primary carb source. I felt like I was missing out.

Thursday:

I woke up cranky and craving carbs, probably in part to avoiding processed carbs, and partly with having to avoid rice with my family meal yesterday. Psychologically, although it wasn’t the main reason, I was still upset that I had to skip on something that was literally so close to home for me. I felt silly that I was letting something as trivial as not eating rice upset me, but at the same time, I felt being upset was justified – food and traditions are very important and become ingrained as part of your values. I felt low in energy.

I talked myself out of a sugar-binge and settled on eating my frittata. To curve my carb-craving, I made myself a faux “peanut-butter and jelly” with a banana smothered in almond butter and sugar-free strawberry preserves:

PicsArt_1404774737459

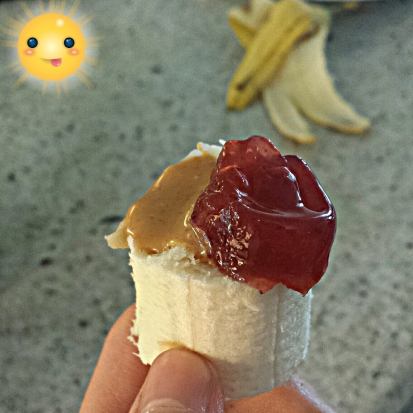
It surprisingly kicked my craving and I felt less cranky afterwards.

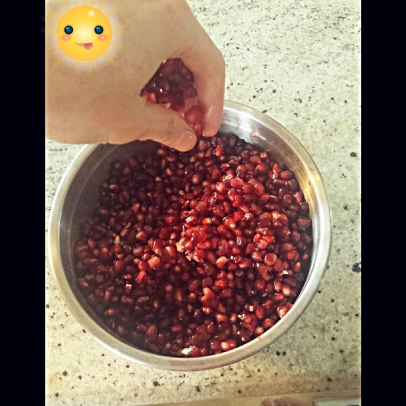
Dinner was the pan roasted chicken. I deseeded three pomegranates that my mom gave me to take home, and polished a third of the mix after dinner as a sweet and light dessert, which further helped curb my carb craving.

PicsArt_1423077325022

By the end of the day, I felt fully satisfied.

Friday:

On Friday, I was more than ready to get back to oatmeal for breakfast. I had to force myself to eat the frittata (thankfully the last of it), and sweet potato hash. I jazzed up my lunch salad to make myself feel better and added some bacon – bacon makes everything better!

PicsArt_1404947775010

I also made myself a nice paleo-friendly dessert to make myself feel better by sautéing some apples in ghee, a touch of maple syrup, and cinnamon. It almost felt like pie, and I was surprised that I didn’t miss the crust that much. Dinner was the chicken once again. Not as good the second time around, but still tasty.

Saturday:

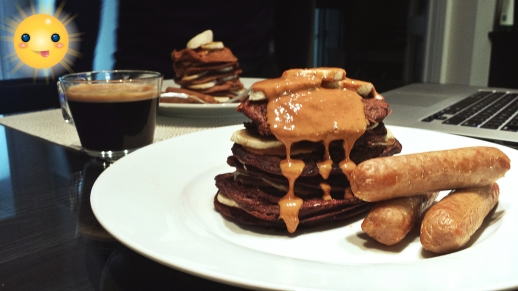
I had more time to make a different breakfast on Saturday, so I treated my boyfriend and myself to some paleo-friendly pancakes and sausages, which I asked him to bring. I was SO excited for this meal! I cooked up the sausages, and made pancakes with sweet potatoes, coconut flour, eggs, and maple syrup as the base. We topped our pancakes with almond butter.

This was my most satisfying meal yet – it felt like I was “cheating”, even though all the ingredients were healthy and paleo-friendly.

My epic paleo pancake and sausage breakfast:

20141218_123159

The pancakes turned out so good, I decided I would share the recipe with you.

Paleo Sweet Potato Pancakes
Serves 2-3 people

Ingredients:

– 300g sweet potato, fully cooked and cooled (about 1.5 cups)
– 4 whole eggs
– 4 tablespoons of organic coconut flour
– 1-2 tablespoons of maple syrup (to taste)
– 1 tsp gluten free baking powder
– 1 tsp cinnamon
– pinch of salt

Instructions:

1. Wrap sweet potatoes in a moist towel and microwave for 8-9 minutes, until tender. Let sweet potatoes cool until they can be handled.
2. Take skin off sweet potatoes and put into blender with remaining ingredients. Blend until smooth.
3. Heat a large pan to medium heat (or use a griddle if you have one) to cook pancakes. Pour 1/4 cup of the batter for each pancake, and cook 2-3 minutes on each side, until cooked through.
4. Top pancakes with almond butter and banana slices (or nut butter and fruit of choice), and serve with additional maple syrup, if desired.

Lunch was back to salad. I love salad, so I wasn’t tired of eating this meal.

Dinner was the last of my chili. The flavour was still on point. Like stews, I found the flavour is still fantastic and even improves after several days.

Sunday:

On Sunday, I woke up motivated to stick to my last day on the paleo diet. I made some fried eggs for breakfast which I ate with fruit and some avocado slices, it felt good to change things up. I also felt full of energy.

I got my grocery shopping out of the way, and opted out of buying oatmeal. I realized I didn’t need it in the morning. I stuck to the “paleo” ingredients, but unfortunately, couldn’t afford to buy high quality meats. It was wasn’t in my budget. I also bought fruits and vegetables that were on special, and only bought organic items that were either reduced or affordable.

Lunch and dinner were the usual suspects – salad, and the last of my chicken and chili. I wasn’t excited to eat the chicken and chili again, but told myself that this week was a new week, and I could try out new, delicious recipes!

Recap of the week on the Paleo diet:

Going bread-free was the easiest part of the process. I actually didn’t crave it at all. What I missed the most was was oatmeal in the mornings, but realized at the end of the week that all the carbs were causing me to have energy crashes by lunch time. I found that by eating a protein, fat, and fiber rich breakfast, I had more energy to last me through to lunch without getting hunger pangs. I think that’s why eating a salad was so easy for me – I wasn’t starving, so fresh and hearty salad did the trick to fill me up until dinner.

Fruit was helpful for kicking sugar cravings, and it felt good to be eating something that was both tasty and good for you. Although I craved processed carbs like cookies and other sweets, I noticed how much better I felt – both physically and psychologically – by eating a healthier alternative.

I think for the most part, I could stick to the paleo diet long term. I was a healthy eater to begin with, and avoid eating processed carbs for the most part. I think the reason why avoiding them was difficult for me is because a) I knew it was off limits, which made them more appealing and 2) I avoided my typical carb-rich breakfast, which made me crave that carb fix at various points throughout the day. Overall, I realized that I had a lot more energy, which is a great reason to stick to the diet. I don’t think there is anything wrong with eating processed carbs once ina  while as a treat. I like to treat sweets and desserts as a treat anyway. Now that I realize how much better I feel avoiding them completely, I will have those treats a lot less, and try substituting them for healthier althernatives. WHat’s more is that there are sitll a lot of paleo foods that can replace the more processed, “unhealthy” foods like breakfast waffles, pies, pancakes. A great example were the paleo pancakes I made – I loved them! They felt like a cheat, and they were still healthy. With some proper planning, I can feel like I’m not missing out on anything. I look forward to those pancakes again this weekend!

The downside to the paleo diet is that it is expensive. Trying to buy all-natural, organic, grass-fed, etc. can get really expensive. It also made me realize how much cheaper groceries are when you include things like processed carbs, beans, and so on, because they are cheap fillers that can stretch out meals and fill you up. Nevertheless, it is still possible to follow the paleo diet – I just have to look for specials and shop smart. This can be difficult, and may require going to several different stores, so it isn’t easy, but it is possible. Organic, pasture-raised, and grass-fed meats will have to be more of a treat, or something I can invest in in the future when my budget allows.

As a chef, I believe it is possible to be paleo. Eating whole foods isn’t difficult, and processed carbohydrates are fairly easy to avoid. If you are adamantly against eating gluten and processed carbs, there are more than enough people who are happy to still eat them and can check things like pasta, rice, etc. for seasoning and flavour. I don’t think it’s necessary to avoid these things completely, so I wouldn’t avoid eating them at all together if I was required to prepare them, but I obviously wouldn’t include these items in my own meals.

I look foward to continuing to eat paleo and continuing to see the positive effects it has on my health, energy levels, and well being.

Hug-a-Farmer: A trip to the TBG Organic Farmers’ Market

Today, my friend Nadeen and I had plans to visit Toronto Botanical Gardens (TBG) located at Lawrence Ave. and Leslie St. in North York. Of course, given the time of year, we weren’t there to see the botanical gardens, but to visit the Organic Farmers’ Market we had read about online. TBG hosts an Organic Farmers’ Market on Thursdays from 2 to 7 p.m. year-round,  (the market moves indoors during the winter). According to the website, you can meet organic farmers at the market and buy local produce, bread, meat, cheese, honey, prepared food, and more. You can find out more information about the market here

TBG2 TBG

Images of the Toronto Botanical Gardens via http://torontobotanicalgarden.ca/

The Toronto Botanical Gardens (TBG) is a very special place — it is one of the few free botanical gardens in North America. Beyond being a place that showcases immense beauty, the TBG is a significant partner in the world-wide effort to conserve nature and teach people about the importance of plants and healthy ecosystems. I can’t think of a more fitting place to host a year round Organic Farmers’ Market than here!

tbg5 tbg4 tbg3

Images of the Toronto Botanical Gardens Organic Farmers’ Market via www.blogto.com and torontobotanicalgardens.ca
Nevertheless, when we arrived at the market (which is located indoors in the winter), we were a bit disappointed. There was no fresh produce of any kind at the market, which had all but 6 small tables with a meager variety of vendors selling honey, dried fruit & nuts, beauty products, and baked goods. The market is undoubtedly more promising in the warmer months, when local produce is more widely available. Our first stop was at the the dried fruit & nut vendor. His offerings, which he generously allowed us to sample, were attractive and delicious, but were neither organic nor local (the nuts and fruits were sun dried in South Africa).

Just as we were about ready to give up and leave the market, Nadeen and I were drawn to the mouthwatering aroma emitting the large table of baked goods located across from the nut vendor. When we approached the table, we were greeted warmly by the vendor, Betsy, of Marché 59 an organic, local, and seasonal bakery and food shop located in Port Hope, Ontario.

PicsArt_1425650087804
PicsArt_1425649779290

Marché 59 at TBG

Since she was so friendly and easy to talk to we stuck around to chat and ask her a few questions about her baked goods and quickly learned, to our pleasant surprise, that Betsy was not only an organic baker, but an organic farmer as well! Betsy and her partner not only own Marché 59, but are also the owners of P & H Farms, also located in Port Hope, Ontario. Their farm is certified organic, boasting a number of certifications, as you can see on their business card below:

Excited and intrigued, Nadeen and I asked Betsy if we could interview her and learn more about her farming history, philosophy, and practices.

A brief bio on Betsy and her “story”:

Betsy grew up on a farm, and took what she learned growing up to continue farming for a living. She and her partner grew red clover, which fixes nitrogen in the soil. It was tradition in Ontario to grow red clover to help fix the soil. Her family sold the seeds, but were unable to sell the “hay”, since animals can’t eat red clover hay. In about 2006, farming began to change. Soy became the most organic crop on many farms, but it had the opposite effect of red clover on the soil – soy leaches nutrients out of the soil. Nevertheless, Betsy’s family had to find a way to make the red clover profitable. Luckily, they were approached by a midwife who was interested in the red clover blossom. Apparently, the red clover blossom is high in estrogen, which is a very important hormone for the female sexual and reproductive development. The midwives were interested in the blossoms as a menopausal remedy, which is said to help with symptoms of menopause as hot flashes and mastalgia. Nevertheless, the demand for the red clover blossom was not very high, so Betsy and her family had to grow more profitable products. Knowing that they were capable of growing red clover leaf seeds, Betsy’s family began growing fruit and vegetable seeds, since there was reasonable demand for them. However, to grow the seeds, the fruit of the plant must ripen until it is basically rotting on the plant. Betsy noticed that there was huge waste in growing the seeds and letting the fruit and vegetables go to waste, especially since they were of such great quality. Furthermore, it would be more profitable for their farming business to sell their harvested fruits and vegetables, rather than their seeds. Now, Betsy and her family grow a variety of different fruits of vegetables (over 200!), that they sell at various farmers markets, and at their bakery and food produce store, Marché 59, which they opened in 2012. They also have 30 goats on their farm, from which they obtain their own goats milk, and make their own goats cheese! Since they do not pasteurize their goat dairy products, they are not able to sell them at their store. Nevertheless, the dairy does not go to waste: they use the goat dairy in their baked goods at the bakery! This is possible because baking/cooking the dairy pasteurizes the milk/cheese. Through the years, Betsy’s farming business has grown and evolved with the demands of the market, the conditions of the soil, and the opening of their bakery. Due to their success at the TBG Farmers’ Market, Betsy’s organic bakery, Marché 59, runs the café at TBG from May through October!

PicsArt_1425649981467

Betsy at her display of baked goods from Marché 59 at TBG Organic Farmers’ Market

What is Betsy’s philosophy on organic farming? Why did they chose to go organic?

Growing up, Betsy saw the immense advantages of conventional farming. She was quite young when farming changed after the Second World War, when all crops were sprayed with chemicals to produce higher yields. She noticed how this affected the crops and the land: their fruits and vegetables were larger, yet less flavourful. While the yield was higher, the soil quality suffered. When it came time to have her own farm, Betsy had a gut feeling that organic was the way to go to improve not only the quality and flavour of her crops, but to preserve the health of the land and soil. While her family was growing red clover leaf, they never sprayed the crops, and were technically “organic”. Nevertheless, her farm was not certified organic. When the midwives had approached her farm wanting the red clover blossom, it was very important for them that the product be organic. That was when Betsy made sure to get an organic certification for her farm, knowing it would help the success of her business. While her initial motive to go organic was partially business driven, Betsy has always realized the positives of organic farming, and now believes it is the only way to go. She spoke of her concerns for conventional farming, saying that int he long term, it will completely ruin not only the environment, but our health as well [from consuming the chemicals used]. She said that many people claim that organic farming is unreasonable because there is no way that it will feed the entire world population, but she wisely pointed out that conventional farming does not do so either – millions of people in the world do not see its “benefits”. The concern about the yield of organic farming is one that we are not even close to scratching the surface of, and when the demand for organic farming increases, means will be made. She is adamant that all her products continue to be organic, and wishes more people were aware of the benefits of organic products and farming. You can find out more about Betsy’s farm and their large variety of products on their website, P & H Farms.

PicsArt_1425649556302

Betsy and I at TBG Organic Farmers’ Market

What I learned today was that organic farmers want their story to be heard. Betsy was so warm, friendly, and happy to tell us about her farming story and her organic philosophy. I am so glad that I am able to share Betsy’s story and her passion for organic farming, because she is a true believer in the organic movement and is doing so not for her personal benefit but to better the environment, the longevity and health of or land and soil, and of course, our health! Despite the growing popularity of organic products, Betsy and her family could increase their yield tremendously by going conventional, but chose not to for those reasons. I also learned that as a farmer you must be open to change to be successful — what you begin growing is not necessarily what will help you survive, or what you will grow 10 or even 5 years from now. You must be willing to change your crops depending on the weather year to year, the soil conditions, the demands in the market, and so on. It is not an easy task or for the faint of heart, but when you are passionate about it, you are willing to suffer the risks and potential “off” years. Furthermore, with farming, slow and steady is what gives you longterm profit. Crops don’t all grow overnight, things like hazelnut trees, which Betsy has four different varieties of on her farm, will not give you yields right away. That is why patience and variety are important: you can’t put all of your eggs in one basket! 

At the end of the day, our experience at the Toronto Botanical Gardens Organic Farmers’ Market was a fantastic one, because of our opportunity to meet and speak to Betsy and hear her story. When we told Betsy the purpose of our visit, and that the name of our assignment was titled “Hug a Farmer”, she told us she felt hugged, and sent us each home with our choice of a baked good! I chose an almond croissant, which was one of the best I’ve ever had. Although I am already a believer of the organic food movement, Betsy’s first hand experience and philosophy reaffirmed my beliefs and the importance of eating local, organically grown produce.

Once again, for more information on the Toronto Botanical Gardens Farmers’ Market, Marché 59, or P & H Farms.

I hope you enjoyed reading!

Cooking Game: My Mom’s Lamb Tongue Recipe

In my last blog post, I talked all about one of my favourite cuts of meat: the tongue. I shared with you some facts as well as the ideal cooking methods to get perfectly tender tongue, with a recipe. Today, I’ll be showing you a detailed step-by-step along with some pictures of my mom’s recipe for lamb tongue. Let’s get started!

Last weekend, I told my mom that I would love to learn her recipe for lamb tongue. She was more than happy to make it for dinner that evening, because tongue meat is a rich, delicious meat that many Iranians grow up eating and enjoy. Despite it’s popularity, however, my mom told me that tongue was eaten only on special occasions. Meat, in general, was expensive, so it was only eaten a couple times a week. So, my mom and I headed to our trusty Iranian butcher at Khorak Supermarket, an Iranian supermarket located near Yonge and Finch in Toronto. If you’re in Toronto and have trouble finding lamb or beef tongue, rest assured you can always find it here!

PicsArt_1422488707804
Me at Super Khorak, pointing at the huge display of lamb tongue!

We purchased 6 lamb tongues to have with dinner that night. Lamb tongues are quite small, and a lot smaller than beef tongues, so I would recommend about 2 per person.

Once we arrived home, it was time to start prep for Khorak e Zaban, which translates into English as “meal of tongue”. As you can imagine from its very vague name, it’s one of those recipes that gives you freedom in terms of the flavours and ingredients you choose to include. Nevertheless, the cooking method is the same, and similar aromatics are used across the board.

The first thing my mom did was preheat the oven to 325F. She then cleaned and then soaked the lamb tongues in some water for about 20 minutes while she prepped the rest of the ingredients. Soaking the tongues in water just helps “freshen” and “perk” them up. The tongues we purchased were quite fresh, so they would have been fine with just a quick wash as well.

PicsArt_1423938148478

Here are the lamb tongues after being washed and soaked in cold water. *The key to indicate these photos are mine is the hamsa keychain at the top left of my photos.*

Next, my mom chopped up a large bunch of green onions, both green and white ends, as well as a large clove of garlic. You can also use a regular white onion.

 PicsArt_1423938540621

She then melted about a tablespoon of ghee (clarified butter) into a sauteuse over medium heat. Ghee is a great cooking fat with because it has a much higher smoking point than butter, while still imparting the delicious butter flavour.

PicsArt_1423939200775

Once the pan and ghee was hot, we added the green onions and the garlic. You want to get just a bit of colour on these, a light golden brown. This should take 5-8 minutes.

PicsArt_1423939093898

To this mixture, we added about a teaspoon of turmeric, and 1/2 tsp of salt, and a pinch of black pepper. Turmeric gives a beautiful golden colour, and is very aromatic. It is used frequently in Iranian cuisine. We let it toast for a minute or two with the onions and garlic in the pan.

PicsArt_1423939976964

Then it was time to add the lamb into the pan. We added them all in, and spread them around in the pan. Give them a quick sear on each side, 1-2 minutes

PicsArt_1423940476705

After searing the tongue, my mom added about 2 cups of water to the pan, just enough to immerse the lamb tongues in liquid without completely covering them. You could also use beef, veal, or chicken stock, water you have on hand.

PicsArt_1423940984611

After adding the water, my mom put a lid on the pan and placed it in the preheated oven at 325F for about 3 hours, until the lamber was very soft and tender. As a reminded about the cooking method for tongue, it must be low and slow! My mom chose to braise the meat, which is a combination cooking method using both dry (searing the meat on higher heat) and moist heat (adding the water and stewing the meat at a lower heat) because it works well with tough cuts of meat. The tongue is an active muscle in the body and for this reason is a tougher cut, so it needs time to break down and tenderize. If cooked too fast or at too high of a temperature, the lamb tongue could result in a tough, rubbery piece of meat that is very unpleasant to eat. This is why braising the tongue for a longer cooking time helps break it down and make it nice and tender.

After about 3 hours, we pulled the lamb tongue out of the oven. Here is the beautiful finished product, garnished with some fresh mint!PicsArt_1423941576152 PicsArt_1423941105134

I mentioned in my last post that the tongue must be cooled a bit and then peeled before serving. In this case, the lamb tongue was so tender after cooking, skin included, that we didn’t find it necessary, it was perfectly edible! This probably wouldn’t have been the case with a much larger and tougher beef tongue. Nevertheless, if you’re eating lamb tongue or serving it for the first time to people who have never had lamb, it is a good idea to remove the skin, as it could be unappealing.

We served up the lamb tongue with some basmati rice, and a side salad. It was an absolutely delicious meal!

Here is my mom’s full recipe for lamb tongue below.

Khorak e Zaban
serves 3

Ingredients:

  • 6 lamb tongues (approximately 150 grams each)
  • 1 clove of garlic, minced
  • 1 tbsp of ghee
  • 1 large bunch of green onions, finely diced
  • 1 tsp turmeric
  • salt and pepper, to taste

Directions:

Prep: Before beginning the cooking process, clean and then soak the lamb tongues in cold water for about 15-20 minutes, to help “freshen” the tongues. Dry on a paper towel before searing.

Method:

Preheat oven to 325F.

1- Heat 1 tbsp of ghee over medium heat
2- When ghee is hot, add in diced green onion and garlic. Cook until light golden brown, about 5-6 minutes.
3- Add 1 tsp of turmeric, 1/2 tsp of salt, and black pepper to taste. Toast turmeric for 1-2 mins.
5- Add in lamb tongue to the pan, and sear for 1-2 mins on each side.
6- Add 2 cups of water/stock to the pot, enough to immerse the lamb tongue but not cover completely.
7- Cover pan with a lid and braise lamb tongue in the oven for 2-3 hours until tender.
8 – Remove tongue, let cool to remove skin if needed, and serve with pan juices. Serve with rice and salad/vegetables.

I hope you were encouraged to try out lamb tongue. Let me know if you do!

Game Meat: Lamb Tongue

The tongue of an animal is one of the cuts of meat that most reminds me of the sacrifice that was made to provide us with food. The tongue is what the animal first used to take in the food that would help it grow into what it would become. Perhaps it is for this reason, combined with the time and patience it takes to prepare a tender tongue dish, that makes it so special and exciting to eat. It also helps that tongue meat is incredibly delicious, it is easily one of my favourites!

lambtongue cowtongue
Images found here and here.

For this blog post, I have chosen to focus on the lamb tongue, because it is an absolutely delicious, underrated, and underused cut of meat that I want more people to try and know about. I love beef tongue as well, but I am partial to lamb because I just love the flavour of lamb, and will always chose lamb if given the choice between the two. Lamb tongue is also significantly smaller than beef tongue, which means reduced cooking time and increased tenderness. Lamb tongue is the kind of meat I crave at this time of year because the way we prepare it in my family is warm, rich, and hearty, making it perfect and comforting in the cold winter months. In my Iranian household, the lamb or beef tongue is served on special occasions due to the prolonged cooking time. The lamb tongue (or beef tongue), however, is not really considered a delicacy in my culture, because its consumption (along with other offal/organ meats) reflects the need to waste as little of the butchered animal as possible. This mentality is shared by other cultures as well, most notably in Asia, the Middle East, and parts of Europe. Unfortunately, the tongue is a cut that most people in North American don’t grow up eating, so it seems foreign. It doesn’t help that the look of tongue can be repelling, which makes many people squeamish and reluctant to try it out. However, when prepared properly, the tongue has a velvety, buttery texture and a wonderfully rich and deep flavour. Believe me when I say it is worth a try!

I headed to the St. Lawrence Market located at Front and Jarvis in Toronto to see if I could find some lamb tongue. I was sure I would be able to find some, given the number of butcher shops located in the market. Unfortunately, none of the butchers sold lamb tongue. In fact, the only butcher to have tongue was Whitehouse Meats, which happened to have a coupe beef tongues. They were vacuum packed, as you can see in the photo:

 PicsArt_1422486257767

PicsArt_1422486517302

*The key to indicate that these photos are mine is my hamsa keychain seen at left in both my photos.

I really wanted to get my hands on lamb tongue, so the next day, I went to my trusty Iranian butcher at an Iranian supermarket called Khorak Supermarket located near Yonge and Finch in Toronto. Below, you’ll see me pointing at the lamb tongues, with a close up of the tongues as well.

PicsArt_1422488707804 PicsArt_1422488235692

The best way to cook lamb tongue is using a moist heat method for a long period of time at a low temperature. The tongue is an active muscle in the body and for this reason is a tougher cut, so it needs time to break down and tenderize. If cooked too fast or at too high of a temperature, the lamb tongue could result in a tough, rubbery piece of meat that is very unpleasant to eat. The most common way to cook lamb tongue is to simmer it “low and slow”. This means, cook it for a long period of time in liquid or a stock at at a temperature just below boiling point. According to the Gisslen cookbook, this is at a temperature anywhere between 185 to 205F. Set the tongue on low and leave it on the stove top, in the oven, or even in a crock pot/slow cooker, cover, and let it cook for a long period of time, about 3-4 hours is best. Another method which is a lot faster and still yields tender results is using a pressure cooker which could take as little as 30 mins. It is important to note that after cooking and before eating, the tongue(s) must be cooled enough until they are able to be handled so that the skin of the tongue can be peeled off. This is a must!

peeltongue
I found this picture of removing the skin off the tongue here.

In Iranian cuisine, lamb tongue is often part of a larger dish called “Kaleh Paacheh”, which literally translates to “Head and Hooves”. It is an old recipe that has been around for centuries, and is loved by many. It is essentially a soup made with the whole lamb head (tongue included, of course), and lamb hooves, and is simmered away with onions, garlic, and other aromatics for about 8 hours. It is a simple recipe, but is absolutely delicious. You can find a great recipe for it here.

The recipe I will share with you below, called Khorak e Zaban, uses lamb tongues, only. It is a simple recipe that we make in my family. “Khorak” translates to meal, and “zaban” means tongue. You could easily substitute the lamb tongue in this recipe with beef tongue, but cooking time should be doubled.

Khorak e Zaban
serves 4

Ingredients:

  • 6-8 Lamb tongues (approximately 150-200 grams each)
  • 4 Garlic Cloves
  • 1 Large Onion
  • 1 Bay Leaf
  • 1 tsp Turmeric
  • Salt and Pepper, to taste

Directions:

1- Place the lamb tongues in a large pot.
2- Pour in enough water until the tongues are completely covered.
3- Bring up to a simmer over low heat, and skim off any foam. Now add the onion (quartered), the garlic cloves, and bay leaf.
5- Cover the pot with a lid and continue to cook for 1.5 hours minutes (half cooked).
6- Remove the lamb tongues from the pot. Allow to cool for 10-15 minutes, then peel the skins off the tongues using hands or a pairing knife.
7- Return to pot. Add turmeric, and salt and pepper to taste. Cover the pot with the lid and simmer for another hour over low heat.
8 – Remove tongue, slice, and serve with bread or rice.

I hope you were encouraged to try out lamb tongue. Let me know if you do!

Butternut Squash Soup with Roasted Eggplant, Tomato & Basil

I have to admit, I’ve never really been a huge fan of soup. It was one of those things that my mom made me when I was sick, and I had to eat it to get better, as if it was medicine. I also never found soup to be fulfilling or satisfying; I never understood how people could eat soup as a main and feel full. I think the combination of these two things made me avoid 1) making soups or 2) ordering soup at restaurants, so there are a ton of soups that I’ve heard of, but never tried before. Culinary school, not surprisingly, changed that. Last week was Soup Week. Once we had the technique down to make a variety of different stocks, it was time to put our skills to use and make soup, which is just one of the many applications of a good stock. We made beef consommé, butternut squash soup, clam chowder, and a fish stock. I’m embarrassed to admit that my first time trying a clam chowder was after I made it in my culinary lab!

So here’s the kicker: I enjoyed all the soups we made last week. Yup, every single one. In fact, I took the beef consommé home that night and literally poured it into a mug – yes, a mug – and drank it out of the cup. The following day, I chopped up some raw cherry tomatoes and parsley, put them in the bottom of a bowl, and poured hot consommé on top, and had that as a side to a couple of fried eggs in the morning. The chowder, albeit delicious, was a bit too heavy for everyday fare, so the small portion I tried in class was a delicious indulgence. I’d love to make it again, with a few healthier substitutions. And last but not least, my absolute favourite soup, the game changer, was the butternut squash soup. The ingredients were simple: mirepoix (onions, celery, carrot), a pad of butter, garlic, herbs, butternut squash, and chicken stock, cooked and then blended. That’s it! Yet I was amazed that such healthy, simple ingredients tasted so creamy and indulgent. I’m certain this recipe could fool anyone. What’s even better is that it took no time at all to make. Thirty minutes, start to finish!

As you may have imagined, I couldn’t wait to make the butternut squash soup again, and have my boyfriend and I to enjoy it for dinner during the week. I made butternut squash soup based off the method in class but decided to put a twist on it. After all, that’s what culinary school is all about: we master the basics, so we can use our creativity and imagination to build on them. My boyfriend and I both love Mediterranean flavours, so that was my starting point. I had some fresh basil in the fridge that we had purchased from the farmers market on the weekend that needed to be used up. We also had a couple huge eggplants, and some beautiful vine tomatoes in the fridge. So there you have them, the supporting stars to the remixed butternut squash soup, which I will now call “Butternut Squash Soup with Roasted Eggplant, Tomato & Basil“.

Here’s all the ingredients for the soup:
PicsArt_1417832494335
Butternut squash, onion, carrots, celery, eggplant, garlic, fresh thyme, fresh basil, and chicken stock. Not pictured: organic butter, bay leaf, olive oil, salt & pepper.

I started off by preheating the oven to 400ºF to roast the eggplant and tomatoes with half of the garlic, thyme, and basil. I stuck the garlic cloves into the tomato halves and put the basil underneath the tomatoes to prevent them both from burning. They all got a generous drizzle of olive oil and some salt and pepper before going into the oven for about 45 minutes, or until the eggplant and tomato were caramelized.

PicsArt_1417834604462

While the eggplant, tomato, and garlic was roasting, I prepped the rest of the veggies: medium dice for the squash, onion, carrots, and celery. Peeling the butternut squash takes a bit of muscle. Make sure to use a proper chef knife!

PicsArt_1417834835028
You see the greenish veining? All of that needs to go. It can be bitter.

Then, I sweated them in some butter. First went the celery, onion, and carrots. You don’t want any colour on them! Next, I added the garlic and butternut squash. You want the veg to get soft, but not caramelized.

PicsArt_1417835051246

At this point, the eggplant and tomatoes were ready to take out of the oven. They were beautiful and caramelized:

PicsArt_1417835464622
I separated the basil leaves and the thyme to be discarded.

After letting it cool for 10 minutes, I scraped the eggplant flesh out of the skin.

PicsArt_1417835642880

Then, I added the tomatoes, the eggplant flesh, and the mirepoix veggies to a large pot:

PicsArt_1417836723699

To this, I added 1L of chicken stock, a bunch of basil, the rest of the thyme, bay leaf, salt, and pepper:

PicsArt_1417836927212

I let this simmer for about 20 minutes to allow all the flavours to come together and intensify.

After 20 minutes, I blended it in my Vitamix until smooth. I made sure to fish out the tomato skins, basil leaves, and thyme before blending.

PicsArt_1417837008449PicsArt_1417837216059

After it was nice and smooth, it was time to plate it and give it a try. I topped it off with some basil chiffonade:

PicsArt_1417837521507
And voila…Delicious!!

I really loved my remix of the butternut squash soup. The eggplant gave it an added creaminess, and the basil gave it a wonderful subtle fragrant note. The tomato gave the soup a nice acidity, that “cut through” the rich flavours, without giving the soup a distinct tomato taste. The flavours paired very well together. The one change I would make to this recipe to make the tomato flavour to come through more would be to add a tablespoon of tomato paste to the mirepoix. Nevertheless, the soup was still fabulous, and I would definitely make it again. The soup got a stamp of approval from my boyfriend. As I predicted, he thought there was cream in the soup. He was amazed and pleased to know that the soup was chock full of healthy vegetables, and nothing more. It’s now on the weekly meal prep menu. Good news for me, since it’s so easy to make!

Butternut Squash Soup with Roasted Eggplant, Tomato & Basil
8-10 servings
1 medium-large butternut squash
1 large eggplant
3 tomatoes (vine or roma)
1 large yellow onion
2 medium carrots
2 stalks of celery
2 tbsp butter
2-3 tbsp extra virgin olive oil
1-1.5L of chicken stock (1L minimum, more for thinning out)
6 cloves of garlic
1 bunch of basil (~20 or so leaves)
4-5 sprigs of thyme
1 bay leaf
Salt & pepper, to taste

Method:
1. Preheat oven to 400ºF.
2. Cut the eggplant in half, lengthwise. Core the tomatoes and cut in half lengthwise. Cut 3 cloves of garlic in half.
3. Drizzle some olive oil on a baking sheet lined with tinfoil and place a leaf of basil under each tomato half. Place a garlic half into each tomato half. Use 2-3 sprigs of thyme and distribute evenly on top of tomato halves and eggplant halves. Drizzle everything with olive oil, and add salt and pepper to taste. Roast in oven for 45 minutes until tender and caramelized.

4. While eggplant and tomato are roasting, cut celery, carrots, and onion into a medium dice. Mince remaining 3 cloves of garlic. Peel and deseed butternut squash, and medium dice. Heat a sauté pan over medium heat, add 2 tbsp of butter, and begin to sweat celery, carrots, and onion. Do not add colour, just soften. After 3 minutes or so, add minced garlic and butternut squash. Continue to sweat until butternut squash begins to tenderize, but not caramelize, about 8-10 minutes. Set aside.
5. Check on eggplant and tomatoes. If ready, remove from the oven, and allow to cool. Scoop eggplant flesh out with a spoon and discard the skin. Discard basil leaves and thyme. Add eggplant, tomatoes, and garlic to a large pot. Add butternut squash veg mix to the same pot. Pour in 1L of chicken stock.
6. Over medium heat, bring pot with all vegetables to a simmer. To the pot add the remaining thyme, 5-6 leaves of basil, and bay leaf. Let simmer for 15-20 minutes. Add salt and pepper to taste.
7. After 15-20 minutes, the soup is ready to blend. Before blending, discard tomato skin if it has separated from the tomato. Discard basil leaves and thyme. Be careful when blending, start on a low speed.
8. Blend soup until smooth. If the soup is too thick, add more chicken stock. Chiffonade remaining basil for garnish. The soup is now ready to serve.

Do you like butternut squash soup? What is your favourite soup? Let me know in the comments!

Sarah

Moraba-ye Haveej: Persian Carrot Jam

I had a very different upbringing than most Canadians. My parents immigrated from Iran in the early 80s, shortly after the Iranian Revolution. They had to work extremely hard to find their place in Canada, having to start their lives from scratch. My grandparents arrived shortly after and lived with us for several years before they were able to make do on their own. I am lucky and proud to have spent so much of my childhood with my grandparents; they helped raise me and shape me into the person I am today.

My fondest childhood memories are held in the kitchen with my grandmother. My mornings were often spent at the dining table with a hearty Iranian breakfast before me, that she prepared lovingly for me. While I ate, I watched her working quietly in the kitchen, heedfully preparing our next meal for the day. Though there was not a single dish that my grandmother laboriously prepared that I did not enjoy, it was the simple breakfast that I enjoyed the most. A typical Iranian breakfast, or sobhaneincludes a lot of fresh brewed chai (tea, a must!), noon (persian flatbread), paneer (persian panir, derived from goat or sheep’s milk, and sometimes cow’s milk), gerdu (walnuts), sabzi (herbs like mint, parsley, dill, etc.), fresh fruit (usually grapes, tomatoes, and cucumbers), sarshir (breakfast cream), asal (honey), and moraba (any kind of fruit jam).

sobhaneh irani1persianbreakfast

Examples of Iranian breakfasts via www.pret-a-voyager.com and outyourbackdoor.com

I’ve had Iranian breakfast numerous times while I’ve been away from home, but there’s one thing that is never the same: the moraba, which is jam. My grandma made a variety of jams and preserves from scratch — in fact, she pickled, fermented, and preserved anything and everything! She is from a time where refrigerators and freezers didn’t exist; food had to be preserved somehow to keep for long periods of time. There are many methods of food preservation, like canning, pickling and drying, to name a few. All these methods attempt to remove one or more of the factors necessary for the growth of food-spoiling microbes. Jam-making is a method of food preservation. How it works, according to this North Dakota University food preservation article, is through the high concentration of sugar in the jam. The sugar effectively draws water out of any microbes in the food and dehydrates them.

My absolute favourite jam that grandmother made was moraba-ye haveej”, which translates to carrot jam. It may not sound like much, but I assure you, it is the most delicate and fragrant jam you will ever taste. Not only was this my favourite jam, it was my grandfather’s favourite as well. Unfortunately, he passed away this past summer. In his memory, I decided to make this jam and give it my grandmother. Not only will she be proud that I made her recipe, it will also be a reminder of the mornings we all got to spend together. The recipe for the jam, as you may have gathered, is my grandmother’s. However, you can find many versions online, but in my humble opinion, they just don’t compare! My grandma’s version is very authentically Iranian, because it includes both cardamom and rosewater. They are the reason this jam is so unique and aromatic. The rosewater and cardamom in the recipe are what really make it unlike any other jam.

I put a little twist on this recipe by buying some beautiful rainbow carrots from the Farmers Market at St.Lawrence Market last Saturday. I couldn’t help myself, they were too beautiful! I know my grandmother will love the addition of colour.

PicsArt_1416007091122

Here is everything you will need for this jam:

PicsArt_1416012121848

Carrots, sugar, cardamom, oranges, lime, and rosewater. In addition to the rainbow carrots, I added the same amount of orange carrots, to get two pounds worth.

After peeling the carrots, I then used a box grater to “julienne” the carrots. You could do this with a food processor, of course, and get a precise julienne. I kept it rustic, like my grandmother would.

The grated carrots looked so beautiful! Mother nature is amazing.

IMG_20141114_175858

With my ingredients prepped, it was time to get cooking. I put two cups of water along with the sugar, cardamom, and the peel of both the oranges into a pot on high heat.

PicsArt_1416012813957

I stir, stir, stirred to dissolve the sugar. Once the mixture came to a boil, I let it simmer for five more minutes, until the mixture began to thicken a bit and get “syrupy”. Then, I added the carrots.

PicsArt_1416013208709

Boil this mixture until the carrots soften, 15 minutes. At the end of the cooking process, I added the orange juice, lime juice, and rosewater.

PicsArt_1416013780781

The colours began to fade, but the difference was still distinguishable! A few minutes later, the mixture was ready for canning.

PicsArt_1416013920279

I sterilized the jars, once again as per this helpful article. Sterilization is absolutely necessary in jam-making, to kill all potentially harmful microbes.

The final, delicious product:

PicsArt_1416014275392

Once the jam cooled down a bit, I couldn’t help but dig in while it was still warm. My goodness, it was delicious, and took me right back to my childhood. As I mentioned earlier, this jam is usually eaten with breakfast. It can be served on toasted bread, on its own or with cheese (preferably a salty cheese like feta!), butter, cream cheese, or mixed into thick, creamy yogurt. Nuts like pistachios, almonds, or walnuts are commonly paired with this jam as well. The possibilities are endless! My favourite way to eat this jam is right off of a spoon (no shame!), or on toast with a delicious, salty paneer. The contrast of the salty, creamy cheese with the sweet jam is heavenly.

I wouldn’t change a single thing about this recipe. The rainbow carrots, however, don’t look so “rainbow” in the final product, but they do provide some dimension; I see a gradation of yellow, orange, and red in the final product. The purple carrots basically turned red, but I quite like how it turned out!

Here is the easy to follow recipe:

Moraba-ye Haveej (Persian Carrot Jam)

Makes 2 x 500 mL jars 

  • 2 lbs carrots, peeled and julienned
  • 2 cups of water
  • 2 cups of sugar
  • 2 oranges, juiced and peeled
  • 1 lime, juiced
  • 1 tablespoon rosewater
  • 6-8 cardamom pods

Preparation:

  1. Peel the carrots and cut into juliennes 4-5 cm long, using a sharp knife, mandolin, box grater, or food processor.
  2. Crush the cardamom pods gently, leaving the seeds in the pods.

Cooking:

  1. Dissolve the sugar in the water along with the orange peel and cardamom pods. Bring to a boil, stirring frequently (about 5 minutes). Let the mixture thicken slightly for another 5 minutes, so it has a fluid “syrupy” consistency. Then, add the carrots, and return to a boil for about 15 minutes. The carrots should be soft, and the mixture should be thicker than when it started.
  2. Once the carrots are soft, add in the rosewater, orange juice, and lime juice, and boil for another 2 minutes.
  3. Take off the heat immediately and pour into sterilized jars. Once cool, store in the fridge.

I hope you try out this jam. Comment below and let me know if you do!

Sarah


The day I became a FRUIT HUNTER!

In today’s post, I am going to tell you about my mission to find a fruit I had never seen or tasted before. Now, let me preface by saying that this was no easy feat for me: I LOVE fruit, and eat a lot of it. I consume more fruits and vegetables than anyone I know, or as my boyfriend likes to say, “You eat more fruits and vegetables than a vegetarian!”. My fibre intake? Exemplary. As you can imagine, it took more than a regular supermarket for me to find a fruit that I haven’t had before. Without further ado, let’s take it back to last Friday, the day I was a Fruit Hunter!

Last Friday afternoon, after our last class of the week, my friend Nadeen and I went to St. Lawrence Market together on our quest to find fruit. Lucky for us, it was the start of our Reading Week; we had all the time in the world to enjoy all there was to see, smell, and experience at the beautiful market. I explored every stand, poured over their selection of fruits, inquired about their most “exotic” or “unique” selections, and then revisited each stand. I had NO luck; I had literally tried every single fruit they all had to offer. My friend Nadeen had better luck: she went home with a beautiful star fruit. But me? I’d be lying if I said I had never experienced the sweet, sour crunch of the star fruit.

sfruit

With her success, we left St. Lawrence Market and parted ways to head home for Reading Week. I had a dilemma. Where was I going to find a fruit that I’ve never tried before, if I couldn’t find one in the city’s largest market? Then it occurred to me: I was going home, to visit my parents, in a predominantly Asian/Middle Eastern Area. There are plenty of markets and grocery stores nearby that sell a plethora of exotic ingredients and produce. My quest was not over yet!

A few hours later, with our belongings packed, my boyfriend and I got in the car to head to North York to stay with my parents. He suggested we visit T&T Supermarket, which is an Asian-Canadian supermarket chain which sells primarily Taiwanese, Chinese, and other Asian foods. My boyfriend is Chinese, and would often shop at this supermarket with his parents when he was growing up. He assured me there would be plenty of exotic fruits to chose from. I’m sure he would help me navigate my way around, too! Feeling a bit hesitant and excited at the same time, I agreed to go. I had nothing to lose!

Half an hour later, we arrived at T&T Supermarket in Markham, Ontario.

tt1

Once we entered, we headed straight to the produce section. Papaya from Hawaii, Durian from Thailand, Mango from the Philippines, Lychee from China, Star Fruit from Taiwan…All these beautiful, delicious fruits, but none of them were new to me. I felt defeated once again. Then, my boyfriend turned around and looked at me, with a fruit in hand: “Hey look, it’s a jackfruit! I haven’t had one of these since I was a kid!”. Jackfruit?! Bingo! I had definitely heard of jackfruit before, and funny enough, I had always wanted to try one, but I didn’t think I would ever be able to find one in Canada. Lucky for us, the jackfruit was already peeled, with the flesh ready to eat.

jackfruittt

Now let me tell you a bit about the jackfruit, or the “artocarpus heterophyllus” of the Moraceae family. According to the Encyclopedia of Foods: A Guide to Healthy Nutrition and The Visual Food Encyclopedia, the jackfruit tree is native to the rain forests of India, but has spread to other parts of Asia and is now a staple food in many Asian countries. It is currently grown in most tropical climates beyond Asia as well. It is the largest tree fruit in the world, capable of reaching 100 pounds! Its commercial value is limited by its relative fragility and and by its large size, which complicates handling. For this reason, it is quite expensive, like here in Toronto where it is priced at about $4.99/lb! Jackfruits are typically picked in summer and fall. You don’t wait to harvest until they drop of their own accord — by that time, they would be overripe. Nevertheless, jackfruits can be obtained year round internationally both canned or dried. For us lucky Torontonians, we get it fresh, too!

Here is what a jackfruit looks like whole, hanging on a tree:
jackfruitskin
image from www.npr.org

Now for the exciting part: eating the jackfruit! As soon as we got to my parents’ house, I took the jackfruit and peeled the plastic wrapping off. What immediately hit me was the odour: it smelled like rotting onions! A quick google search and a lot of reassurance from my experienced boyfriend told me that this was normal. After getting past the smell, it was time to eat the fruit.

jack

peeled

I picked up a piece of the jackfruit, peeled the flesh off of the seed (as seen in the photo above) and took my first bite. I noted the texture: somewhat starchy and fibrous, but flexible. It felt like chomping into a slice of orange peel, but obviously without a trace of the bitterness of citrus zest. The jackfruit felt dry to the touch, with a very faint sweet smell and practically no flavour as I placed it in my mouth.

Now for the most important part: the taste! The flavour of the jackfruit literally bursted in my mouth with my very first bite. What was strange was that it tasted so juicy, but no juice came out; the jackfruit is not a very “wet” fruit, it is a starchier one. It tasted like a cross between a pineapple (but much less tart), a cantaloupe (but less juicy), and an unripe banana (with more bite). The jackfruit is quite sweet, and has an undeniable tropical flavour, but really has a flavour unlike any other fruit I’ve ever had. I really enjoyed it.

What makes the jackfruit so unique beyond it’s flavour, texture, and odour is it’s versatility: besides eating it fresh, jackfruits can be dried, roasted, added to soups, used in chips, jams, juices, ice cream. The seeds can be boiled, roasted or ground into flour. Even the tree itself is valuable: high-quality, rot-resistant timber for furniture and musical instruments. Another awesome way to eat jackfruit? Unripe! The jack fruit has a taste similar to chicken when green, making it an ideal meat substitute for vegetarians.

If I were to cook jackfruit, I would definitely buy it green (unripe) to use it as a meat substitute! I would pair it with Chinese flavours for my boyfriend to enjoy; something reminiscent of how he would have had it in his childhood. I found a bunch of wonderful vegan jackfruit recipes here. One recipe that stood out to me was the Chinese Five Spice Jackfruit with Steamed Buns recipe from ChowVegan.

Here’s a pic along with the recipe below:

jackffruit

Chinese 5-spice Jackfruit With Steamed Buns
Makes about 6 – 8 servings

Chinese 5-spice Jackfruit
1 20 ounce can young green jackfruit in brine
1/2 cup chopped white onion
1 lime, juiced
3 garlic cloves, roughly chopped
2 tablespoons soy sauce
1 tablespoon fresh ginger, peeled and minced
1/2 tablespoon chinese 5-spice
1 teaspoon brown sugar
Freshly cracked black pepper

Drain and wash the jackfruit in several changes of water. Squeeze out as much water as you can.

Put the jackfruit in a slow cooker, add the rest of the ingredients and enough water to just cover the jackfruit. Set the cooker for 3 hours, stirring occasionally. The jackfruit should be fork tender and come apart easily. Set aside to cool.

For Serving
1 package of steamed buns, available at the Asian grocery store
Hoisin sauce or vegetarian oyster sauce
2 green onions, julienned
1/2 bunch of cilantro (optional)

Heat up the buns according to the package directions. Open up a bun, spread a bit of the Hoisin sauce on, add some of the jackfruit and a few pieces of the green onion strips or cilantro sprigs. Close bun and eat.

What I learned from this experience is that I am so lucky to live in a multicultural city that offers such a great variety of fresh produce from all over the world. I had always thought that I would never be able to try jackfruit unless I traveled to Asia, but I was wrong! A quick trip to T&T and I can have it at my fingertips (although it is pricey!). I was also amazed at all the different uses of the jackfruit; it is amazing how versatile of a fruit it is. I would never imagine a fruit could be used as a meat substitute, of all things! The jackfruit seems to be the jack of all trades! 😉

Links to all sources used are clickable in the post. I hope you get to try jackfruit, and if you have, let me know what you think of it!

Sensory Evaluation: Trying Thai Coconut Soup!

On Tuesday night, my boyfriend and I went out to eat at one of our favourite restaurants on Queen street called “TCJ Restaurant”, which stands for “Thai Chinese Japanese”. Clearly, the restaurant offers a large variety of dishes, but for the most part we stick to the same dishes: a plate of assorted sushi to share, Pad Thai and seaweed salad for me, and Udon/Hot & Sour soup for my boyfriend. Generally, I’m not the one to order soup; sometime I’ll have a miso soup if it comes with the sushi, or when the mood strikes! This time as I casually perused the familiar menu, I noticed “Thai Coconut Soup”, surprisingly for the first time ever. It intrigued me, since I’ve never had coconut in a soup before, not to mention that I’ve rarely had coconut in a savoury dish! It was the perfect opportunity to try something new, since I knew that if I didn’t like it it wouldn’t go to waste: my boyfriend LOVES soup, and would help me finish the dish.

Before ordering, I really had no idea what to expect. There was no picture of the dish on the menu, so I didn’t even have a visual of the soup. I did have an idea of the flavours I would be expecting: it would be a creamy soup due to the coconut milk, it would have a noticeable lemongrass flavour since that is a prevalent herb in Thai cuisine, with a slight acidity from lime and some fragrant cilantro as finishing accent flavours, since those are practically mandatory in all Thai dishes! Now, I will say that I’m not a huge fan of super-creamy, viscous soups. I much prefer light, brothy soups that just warm the belly and enhance the main dish. I would soon find out!

When the soup arrived, the first thing that stood out to me was the aroma of cilantro, my absolute favourite herb! I smelled the soup up close, and picked up a slight coconut smell. It was not too overpowering, and definitely not an “aritificial” coconut smell, just a mellow one.My mouth began to water! There was another discernible, familiar smell to the soup – a rich, umami smell which reminded me of Miso soup. My guess was perhaps fish sauce, and after quickly looking it up – bingo! It is a common ingredient in both Miso and Thai Coconut Soup. Speaking of which, the soup was also visually quite similar to Miso soup: it had that same cloudy appearance, and looked thin and light. Although it was apparent there was a slight creaminess to it due to the lighter, terracotta colour, the soup did was far from thick or viscous. The test: I dipped my spoon in and the liquid did not coat the back of my spoon – it slid right off. The soup also had specks of red oil on the surface, which I was sure what contributed to the orangey-yellow “terracotta” colour of the soup. I also noticed a few floating vegetables: some carrots, mushrooms, green onion, and of course cilantro. Finally, the first spoonful. It tasted absolutely divine! There was not a distinct initial flavour that hit my tastebuds. I experienced a number of tastes in that one sip: salty, sweet, sour, bitter and umami! There was a slight creaminess from the coconut, which was (luckily for me), not at all creamy, but subtle. Just enough to elevate a thin, watery soup to something a bit more creamy and luxurious. There was no strong fishy taste from the fish sauce, but there was definitely an umami flavour there which I’m sure was in large part due to the fish sauce. The soup was salty, but not overbearingly so, and I experienced a light sweetness at the tip of my tongue. The next sensations were sour notes – definitely a LOT of lime in the soup! I could feel it on the sides of my tongue near my jaw. Then there was an unexpected, bold spiciness that hit me at the back of my throat. Wow! I was totally not expecting that much spice, and it wasn’t until the first sip went down that it hit me. Nevertheless, it definitely was not unbearable, and made that first sip all the more exciting for my tastebuds! Those red specks on top of the soup had to be chili oil! WIth my next sip, I closed my eyes and paid attention to pick up other details: I definitely picked up some of the floral, fragrant flavours of ginger, lemongrass and cilantro. I could not physically see ginger or lemon grass in the soup, but I could tell they had definitely steeped in the broth. With my next bite, I picked up some of the veggies suspended in the liquid. Crunch. The carrots still had texture to them, and I actually really enjoyed that! Who doesn’t love a contrasting texture?! I do! Then there was a thin, very thinly sliced vegetable that I picked up, which was slightly softer, but not mushy. It was ginger! No wonder I could taste it! As I continued eating the soup, I saved the cilantro leaves to have at the end. Cilantro, to me, makes everything taste better ;). When the waitress came around, I told her I was really enjoying the soup. I couldn’t help but ask her where the sweetness was coming from in the soup – was it from the coconut? She explained to me that they use the slightest bit of sugar in the soup – a couple tablespoons for each large batch they make, and it contributes to the well-rounded flavour of the soup. I could not agree with her more. The soup lived up to what Thai food is known for best: balance. The soup was a harmonious blend of spicy (from the chili oil), the sweet (from the sugar), the sour (from the lime and lemongrass), the salty, and the umami (from the fish sauce). The creaminess from the coconut actually further balanced this dish, because it contrasted the spice. The floral, fresh notes from the lemongrass, ginger, and cilantro also brightened the soup, giving it a beautiful freshness.

If it wasn’t apparent, I absolutely LOVED the Thai Coconut Soup. I don’t know why I waited to so long to try it! I actually looked up the recipe, and it is SO simple and easy to make! I think I will try this one out:

http://www.bonappetit.com/recipe/tom-kha-gai-chicken-coconut-soup.

I don’t even have to wait to go out to have it again, and I think I will give it a shot this weekend. The only ingredient that isn’t as easy to get a hold of is the lemongrass, otherwise, most of the ingredients are common and found at all grocery stores! I can’t wait make this at home.

Eating this food taught me how important balance is, and what a great experience it is to eat harmoniously balanced food. Thai food is known for this. It has inspired me to think of all the five basic tastes when I’m cooking – salty, sweet, sour, bitter and umami. I also definitely have to try and make more Thai food since it is apparent that I enjoy the flavours so much!

PicsArt_1412358924482PicsArt_1412358741854 PicsArt_1412359529096 PicsArt_1412359113345 PicsArt_1412359330371

First Post: Culinary Biography

Polihale Sunset

Hello readers,

My name is Sarah Ehsani, and I am currently enrolled in the Chef Training H112 program at George Brown College. I graduated from Glendon (York University) in 2013 with a trilingual degree, specializing in Hispanic Studies. However, after getting my bachelor’s degree, I was not at all interested in pursuing languages. Culinary school had always been a lingering idea in my mind ever since graduating from high school, but I never gave it any serious consideration – I didn’t think it was “academic” enough to meet my parents’ standards. I am now a makeup artist, and although I enjoy the creative liberty of my work, I find myself longing to work in the culinary field. Lucky for me, my parents completely supported my decision to go to culinary school, so I bit the bullet! My goal after completing this program is 1) to be a great cook, and 2) to work in the culinary field. At this point I don’t know what I want to do in the field, so I’m hoping the experience and knowledge I gain will give me clarity.

Now that you know a bit about me, let me tell you about my food philosophy. Throughout my life, I have always been active. I’ve competed and trained in several sports including basketball, martial arts, and most recently rowing. Growing up, I had no idea how to properly fuel myself to perform optimally. However, the older I got, the more interested I became in not only the creative aspect of food, but the nutritional aspect as well. I believe in eating whole, fresh, and colourful food, and limiting processed food. I eat and support local food to the extent that my budget allows me! My goal when I cook and experiment with food is to make food that is not only healthy and nutritious, but delicious! Healthy food, contrary to popular believe, does NOT have to lack flavour. Lastly, if you eat well, you move well, too!